 Honda Accord: Symptom Troubleshooting
No picture Is displayed
Diagnostic Test: Self-Diagnosis ModВ©
NOTE: • Check the vehicle battery condition first (see page • 22-90).
• Check  button has been pressed,
and turned off
the display (see owner's manual for more
information).
• Check the connectors for poor connections or loose terminals.
• Before troubleshooting, make sure you have the anti-theft code for the navigation system.
• Make sure that the correct DVD color and version are installed.
• Inspect the DVD for dirt or damage.
• Check any official Honda service website for more service information about the navigation system.
1. Check the No. 15 (10 A) fuse in the under-hood fuse/relay box and No. 18 (7.5 A) fuse in the driver's under-dash fuse/relay box, and reinstall the fuses if they are OK.
Are the fuses OK? YES
-Go to step 2.
NO
-Replace the fuse(s), and recheck.
2. Do the Forced Starting of Display (see page 23-237).
Is the diagnosis menu of the picture diagnosis displayed? YES
-Go into Self-Diagnosis Mode (see page 23-176) to check the links.
NO
-Go to step 3.
3. Shield the navigation display unit from the sun with your hand, and check that the display is back lit (only back light is ON.) Can you see the back light?
YES
-Substitute a known-good navigation unit (see page 23-238), and retest. If the problem goes away, replace the original navigation unit. If the problem is still present, replace the navigation display unit (see page 23-239).
NO
-Go to step 4.
4. Turn the ignition switch to ON (II).
5. Measure the voltage between body ground and navigation unit connector A (8P) terminals No. 1 and No. 2 individually.
NAVIGATION UNIT CONNETCOR A (8P)
Wire side of female terminals
is there battery voltage? YES
-Go to step 6.
NO
-lf the +B wire does not have voltage, repair an open in the wire between the under-hood fuse relay box and the navigation unit. Ifthe ACC wire does not have voltage, repair an open in the wire between the under-dash fuse/relay box and the navigation u n i t .
6. Measure the voltage between navigation unit connector A (8P) terminal No. 4 and body ground.
NAVIGATION UNIT CONNETCOR A (8P)
Wire side of female terminals
Is there less than 0.2 V? YES-
Go to step 7.
NO
-Repair an open or high resistance in the wire , between the navigation unit and body ground (G651) 4-door (see page 22-46), 2-door (see page 22-48).
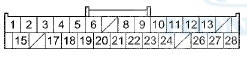
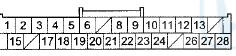
7. Measure the voltage between body ground and navigation display unit 28P connector terminals No. 1 and No. 2 individually.
NAVIGATION DISPLAY UNIT 28P CONNETCOR
Wire side of female terminals
Is there battery voltage? YES-Go to step 8.
NO-lf the +B wire does not have voltage, repair an open in the wire between the under-hood fuse/relay box and the navigation display unit 28P connector. If the ACC wire does not have voltage, repair an open in the wire between the under-dash fuse/relay box and the navigation display unit 28P connector.
8. Measure the voltage between the navigation display unit 28P connector terminal No. 10 and body ground.
NAVIGATION DISPLAY UNIT 28P CONNETCOR
Wire side of female terminals
Is there less than 0.2 V? YES-
Substitute a known-good navigation unit (see page 23-238) and retest. If the problem goes away, replace the original navigation unit. If the problem is still present, replace the navigation display unit.
NO
-Repair an open or high resistance in the wire between the navigation display unit and body ground (G401) (see page 2 2 - 4 0 ).
Vehicle position icon constantly leaves road, moves erratically, or is displayed very far from actual vehicle position
NOTE: • Check the vehicle battery condition first (see page 22-90).
• Check that the GPS antenna is plugged in.
• This is not the same condition as when driving off-road (or on a fire or logging road). This condition is caused by a loss of map matching from a bad sensor input. Check for after market window tinting or other objects that can block the GPS signal. Always do the Map matching (see page 23-133) before proceeding with the troubleshooting.
• Make sure that the correct DVD color and version are installed.
• Inspect the DVD for dirt or damage.
• Check any official Honda service website for more service information about the navigation system.
• Check the GPS signal reception in an open area.
1. Check the GPS icon on the navigation screen.
Is the GPS icon white? YES
-Do the troubleshooting for GPS icon is white or not shown (see page 23-225).
NO
-Go to step 2.
2. Go into the Self-Diagnosis Mode, and use the Yaw Rate test (see page 23-190) to check the yaw rate sensor.
3. Go into the Self-Diagnosis Mode, and use the Car Status test (see page 23-191) to check the vehicle speed pulse.
Are the yaw rate sensor and vehicle speed pulse OK? YES
-The condition may be normal. Check to see if the condition occurs in the same place in a known-good vehicle. If it does, the problem could be in the database. Go to step 4.
NO
-lf the problem is the yaw rate sensor, replace the navigation unit (see page 23-238). If the problem is the vehicle speed pulse, check for an open in the wire between the navigation unit and the ECM/PCM (VSP signal). If the wire is OK, substitute a known-good navigation unit and retest. If the problem goes away, replace the original navigation unit. If the problem is still present, update the ECM/PCM (see page 11-203) if it does not have the latest software or substitute a known-good ECM/PCM (see page 11-204).
4, Substitute a known-good navigation unit, and check to see ifthe problem occurs in the same place.
Does the problem occur in the same place? YES
-The problem is in the database. Report the problem according to the Navigation System Manual under Reporting Errors.
NO
-Replace the original navigation unit (see page 23-238).
Picture is missing a color or tone or is an odd color
NOTE: • Check the vehicle battery condition first (see page 22-90).
• Check the connectors for poor connections or loose terminals.
• Make sure that the correct DVD color and version are installed.
• Inspect the DVD for dirt or damage.
• Check any official Honda service website for more service information about the navigation system.
• Check the navigation screen settings for brightness, contrast, and black level, and check the color screen for map color and menu color.
• Before troubleshooting, make sure you have anti-theft codes for the audio system and the navigation system.
• After troubleshooting, enter the anti-theft codes for the audio system and the navigation system.
• Check for aftermarket accessories that may interfere with the navigation system.
1. Go into the Detail Information & Settings select Monitor Check, and use RGB Color test under Monitor Check (see page 23-180).
Are the red, green, and blue colored circles shown? YES
-The system is OK at this time.
NO
-Go to step 2.
2. Turn the ignition switch to LOCK (0).
3. Disconnect navigation unit connector B (32P) and the navigation display unit 28P connector.
4. Check for loose terminals at navigation unit connector B (32P) and the navigation display unit 28P connector.
Are there loose terminals? YES
-Repair the terminal.
NO
-Go to step 5.
5. Check for continuity between the terminals of navigation unit connector B (32P) and the navigation display unit 28P connector according t o t h e table.
NAVIGATION UNIT CONNECTOR B (32P)
Wire side of female terminals
NAVIGATION DISPLAY UNIT 28P CONNECTOR
Wire side of female terminals
Is there continuity between any of the terminals? YES
-There is ashortinthewire ( s ) between t he navigation unit and the navigation display unit.
Replace the affected shielded harness .
NO
-Go t o step 6.
6. Check f o r c o n t i n u i t y between t h e a p p r o p r i a te t e r m i n a l s of n a v i g a t i o n unit connector B (32P) a n d t he n a v i g a t i o n display unit 28P c o n n e c t o r based o n t h e m i s s i n g coior(s).
NAVIGATION UNIT CONNECTOR B (32P)

Wire side of female terminals
NAVIGATION DISPLAY UNIT 28P CONNECTOR
Wire side of female terminals
Is there continuity? YES
-Go t o s t ep 7.
NO
-There is a n o p e n in t h e w i r e ( s ) between t he n a v i g a t i o n display unit and t h e n a v i g a t i o n unit. Check f o r poor connections or loose t e r m i n a l s at t he n a v i g a t i o n display unit and t h e n a v i g a t i o n unit. If a poor c o n n e c t i o n or loose t e r m i n a l is f o u n d , replace t h e affected shielded h a r n e s s.
7. Check for continuity between the appropriate terminals of navigation unit connector B (32P) and the navigation display unit 28P connector based on the missing color(s).
NAVIGATION UNIT CONNECTOR B (32P)

Wire side of female terminals
NAVIGATION DISPLAY UNIT 28P CONNECTOR
Wire side of female terminals
Is there continuity? YES
-There is a short to body ground in the circuit between the navigation display unit and the navigation unit. Replace the affected shielded harness.
NO
-Replace the navigation unit (see page 23-238). If the problem is still unresolved, replace the navigation display unit (see page 23-239).
Picture has lines or rolls
Diagnostic Test: Monitor Check
NOTE: • Check the vehicle battery condition first (see page 22-90).
• Always compare the screen image to a known-good vehicle. If the screen looks the same, inform the customer that it is a characteristic of the system.
• Check the connectors for poor connections or loose terminals.
• Make sure that the correct DVD color and version are installed.
• Inspect the DVD for dirt or damage.
•Check any official Honda service website for more service information about the navigation system.
• Check the navigation screen settings for brightness, contrast, and black level, and check the color screen for map color and menu color.
• Before troubleshooting, make sure you have anti-theft codes for the audio system and the navigation system.
• After troubleshooting, enter the anti-theft codes for the audio system and the navigation system.
1. Check for electronic aftermarket accessories (possibly hidden) mounted near the navigation display unit or the navigation unit.
Are there any electronic accessories? YES
-Disable the accessories, and recheck.
NO
-Go to step 2.
2. Turn the ignition switch to ON (II), and start up the navigation screen and check it.
Is the picture scrolling horizontally (left to right or right to left)? YES
- • If the color is normal: go to step 3.
• If the picture is scrolling with missing color: go to step 9.
NO
-Go to step 13.
3. Turn the ignition switch to LOCK (0).
4. Disconnect navigation unit connector B (32P).
5. Disconnect navigation display unit 28P connector.
6. Check for continuity between navigation unit connector B (32P) terminal No. 18 and body ground.
NAVIGATION UNIT CONNECTOR B (32P)
Wire side of female terminals
Is there continuity? YES
-There is a short to body ground in the wire(s) between the navigation unit and the navigation display unit. Replace the affected shielded harness.
NO-
Go to step 7.
7. Check for continuity between navigation unit connector B (32P) terminals No. 18 and No. 3, and between terminals No. 18 and No. 19 individually.
NAVIGATION UNIT CONNECTOR B (32P)
Wire side of female terminals
Is there continuity? YES
-There is a short in the wires between the navigation unit and the navigation display unit.
Replace the affected shielded harness.
NO
-Go to step 8.
8. Check for continuity between navigation unit connector B (32P) terminal No. 18 and navigation display unit 28P connector terminal No. 23.
NAVIGATION UNIT CONNECTOR B (32P)
Wire side of female terminals
NAVIGATION DISPLAY UNIT 28P CONNECTOR
Wire side of female terminals
Is there continuity? YES
-Substitute a known-good navigation unit (see page 23-238), and retest. If the problem goes away, replace the original navigation unit. If the problem still present, replace the navigation display unit (see page 23-239).
NO
-There is an open in the wire(s) between the navigation unit and the navigation display unit.
Replace the affected shielded harness.
9. Turn the ignition switch to LOCK (0).
10. Disconnect navigation unit connector B (32P).
11. Disconnect navigation display unit 28P connector.
12. Check for continuity between the terminals of navigation unit connector B (32P) according to the table.
NAVIGATION UNIT CONNECTOR B (32P)
Wire side of female terminals
Is there continuity? YES-
There is a short in the wires between the navigation unit and the navigation display unit.
Replace the affected shielded harness.
NO
-Substitute a known-good navigation unit (see page 23-238), and retest. If the problem goes away, replace the original navigation unit. Ifthe problem still present, replace the navigation display unit (see page 23-239).
13. Go into the Detail Information & Settings, select Monitor Check, and use RGB Color diagnosis under Monitor Check (see page 23-180).
Is the picture missing a red, green, or blue color? YES
-Do troubleshooting for the Picture is missing a color or tone or is an odd color (see page 23-219).
NO
-Operation is normal at this time. Check for loose connections.
Interface dial buttons do not work
NOTE: • Check the vehicle battery condition first (see page 22-90).
• Check the connectors for poor connections or loose terminals.
• Make sure that the correct DVD color and version are installed. The wrong navigation DVD or software version can cause a hardware malfunction.
• Inspect the DVD for dirt or damage.
• Check any official Honda service website for more service information about the navigation system.
• Before troubleshooting, make sure you have anti-theft codes for the audio system and the navigation system.
• After troubleshooting, enter the anti-theft codes for the audio system and the navigation system.
1. Start the vehicle.
2. Go into the Detail Information & Settings select Unit Check, and use Hard Key test under Unit Check (see page 23-182).
Do the interface dial buttons work properly? YES
-The system is OK at this time.
NO
-Go to step 3.
3. Turn the ignition switch to LOCK (0).
4. Remove the audio switch panel (see page 23-117).
5. Turn the ignition switch to ON (II).
6. Measure the voltage between the interface dial 5P connectorterminal No. 4 and body ground.
INTERFACE DIAL 5P CONNECTOR
Wire side of female terminals
Is there battery voltage? YES
-Go to step 7.
NO-
Repair an open in the wire between the driver's under-dash fuse/relay box and the interface dial.
7. Measure the voltage between interface dial 5P connectorterminal No. 3 and body ground.
INTERFACE DIAL SP CONNECTOR
Wire side of female terminals
Is there less than 0.2 V? YES
-Go to step 8.
NO
-Repair an open or high resistance in the wire between the interface dial and body ground (G401) (see page 22-40).
8. Turn the ignition switch to LOCK (0).
9. Disconnect the interface dial 5P connector and navigation unit connector B (32P).
10. Check for continuity between navigation unit connector B (32P) terminal No. 23 and interface dial 5P connector terminal No. 1.
NAVIGATION UNIT CONNECTOR B (32P)
Wire side of female terminals
INTERFACE DIAL 5P CONNECTOR
Wire side of female terminals
Is there continuity? YES
-Go to step 11.
NO
-There is an open in the wire between the interface dial and the navigation unit. Replace the affected shielded harness.
11. Check for continuity between navigation unit connector B (32P) terminals No. 23 and No. 25.
NAVIGATION UNIT CONNENCTOR B (32P)
Wire side of femaie terminals
Is there continuity? YES
-Short in the wires. Replace the affected shielded harness.
NO
-Go to step 12.
12. Substitute a known-good interface dial (see page 23-239), and recheck.
is the system OK? YES
-Replace the original interface dial (see page 23-239).
NO
-Replace the navigation unit (see page 23-238).
GPS icon is white or not shown
Diagnostic Test; Self-Diagnosis Mode
NOTE: • Check t h e vehicle battery condition first (see page 22-90).
• With good reception, the icon is n o r m a l l y green.
• Make sure the GPS antenna is plugged in.
• Check for any aftermarket accessories or metallic window tinting that may be i n t e r f e r i ng with the GPS signal.
• Make sure the vehicle is parked outside, away from b u i l d i n g s .
• Refer to GPS I n f o r m a t i o n (see page 23-188) for r e a l t i m e satellite reception display.
1. Check for aftermarket metallic window tint on the rear window and electronic aftermarket accessories (possibly hidden) m o u n t e d near the GPS antenna or the n a v i g a t i o n unit Is there aftermarket metallic window tint or electronic accessories? YES
-Remove tint o r the accessories and recheck.B NO-
Go to step 2.
2. T u r n t h e i g n i t i o n s w i t c h t o ON (II).
3. Go i n to t h e Self-Diagnosis Mode, a n d use t h e S y s t em Links diagnosis (see page 23-176) t o check t h e GPS antenna.
Is the GPS Ant icon red? YES
-Check f o r a kinked, c r u s h e d , o r disconnected GPS antenna w i r e . If t h e i c on is still red, replace t he GPS antenna (see page 23-240).B NO
-Check t h a t n o t h i n g is b l o c k i n g t h e GPS antenna located under t h e package shelf a n d recheck.
S u b s t i t u t e a k n o w n - g o o d GPS antenna (see page 23-240), a n d recheck. If t h e s y m p t om is g o n e , replace t h e GPS antenna. If t h e s y m p t om is still present, s u b s t i t u t e a k n o w n - g o o d navigation unit (see page 23-238) and recheck. If t h e s y m p t om is g o n e , replace t h e o r i g i n a l navigation unit.
Voice guidance cannot be heard, is broken up, or there is static
Diagnostic Test: Self-Diagnosis Mode
NOTE: • Check t h e v e h i c l e b a t t e r y c o n d i t i o n f i r s t (see page 22-90).
• Check t h e n a v i g a t i o n v o l u m e level (see O w n e r 's Manual).
• Check t h e connectors f o r poor connections or loose t e r m i n a l s .
•If t h e Hard Error Code s t o r e d , check t h e Hard Error Code t r o u b l e s h o o t i n g first.
•Make sure t h a t t h e correct DVD c o l o r and v e r s i o n are installed.
• Inspect t h e DVD f o r d i r t or damage.
• Before t r o u b l e s h o o t i n g , make sure y o u have anti-theft codes f o r t h e a u d i o s y s t em and t h e n a v i g a t i o n system.
•A f t e r t r o u b l e s h o o t i n g , enter t h e anti-theft codes f or t h e a u d i o s y s t em and t h e n a v i g a t i o n system.
1. Turn t h e i g n i t i o n s w i t c h t o ON (II).
2. Press t h e SET-UP b u t t o n.
3. Check t h e v o l u m e and v o i c e feedback setting f o r t he n a v i g a t i o n s y s t em in set-up.
is either set to OFF? YES
-Set t h e v o i c e feedback t o ON, a n d select an a u d i b l e level f o r t h e v o l u m e . NO
-Go t o step 4.
4. Check t h e a u d i o s y s t em operation.
Can you hear the audio? YES
-Go t o step 5, NO
-Troubleshoot t h e a u d i o system.
5. Select t h e Self-Diagnosis mode.
6. Clear t h e hard error code.
7. T u r n t h e i g n i t i o n s w i t c h t o LOCK (0), a n d t h e n back to ON (II).
8. Check f o r t h e h a r d error code.
is there a Hard Error Code stored? YES
-Refer t o t h e Hard Error Code t r o u b l e s h o o t i n g . NO
-Go t o step 9.
9. Substitute and a known-good audio unit (see page 23-114), and recheck.
Is the system OK? YES
-Replace the audio unit (see page 23-114).
NO
-Replace the navigation unit (see page 23-238).
Voice control does not work/respond
Diagnostic Test: Mic Level
NOTE: • Check the vehicle battery condition first (see page 22-90).
• Check the connectors for poor connections or loose terminals.
• Make sure that the correct DVD color and version are installed.
• Check any official Honda service website for more service information about the navigation system.
• Before assuming that a voice complaint is hardware related, ensure that the voice control system is being operated correctly.
- Make sure you are on the correct screen when trying to issue a voice command. For instance, the command "Find the nearest Italian Restaurant" only works on Map screen. (See the Navigation System manual for a complete list of allowed voice commands for the information being displayed).
- Close the windows and moonroof.
- Set the fan speed to low (1 or 2).
- Adjust the airflow from the air conditioning vents so that they do not blow against the microphone on the ceiling.
- Pause after pressing the navigation TALK button, then give a voice command clearly in a natural speaking voice.
If the system cannot recognize your command, speak louder.
- If you speak a command with something in your mouth, or your voice is too husky, or high pitched, the system may misunderstand your command.
• Check for a loose roof console microphone; if it's loose, tighten it.
• Before troubleshooting, make sure you have anti-theft codes for the audio system and the navigation system.
• After troubleshooting, enter the anti-theft codes for the audio system and the navigation system.
• Determine ifthe problem only happens to one person, or everyone who uses the system.
• Ifthe system only has a problem with one person's voice, this should be considered a system limitation.
1. Turn the ignition switch to ON (II).
2. Go into the Self-Diagnosis Mode select, Mic Icon Menu, and use the Mic Level test under Functional Setup (see page 23-187) to check the operation of the Talk and Back buttons.
Are the navigation TALK and BACK buttons operational? YES
-Go to step 3.
NO
-Check for an open or short to ground on navigation unit connector C (16P) terminal No. 12.
3. Use the Mic Level diagnostic under Functional Setup (see page 23-187) to check the operation of the microphone.
Is the microphone operational? YES
-Check the operation of the voice control system (see the Navigation System Manual).
NO
-Go to step 4.
4. Clear the hard error code.
5. Turn the ignition switch to LOCK (0), and then back to ON (II).
6. Check for the hard error code.
Is DTC 2707 indicated? YES
-Do the 2707 troubleshooting.
NO
-Go to step 7.
7. Measure the voltage between the front HFL-navigation-ANC microphone 7P connector terminals No. 6 and No. 7 individually.
FRONT HFL-NAVIGATION-ANC MICROPHONE 7P CONNECTOR
Wire side of female terminals
Is there battery voltage? YES
-Go to step 8.
NO
-lf the +B wire does not have voltage, repair an open in the wire between the under-hood fuse/relay box and the front HFL-navigation-ANC microphone 7P connector. If the ACC wire does not have voltage, repair an open in the wire between the under-dash fuse/relay box and the front HFL-navigation-ANC microphone 7P connector.
8. Measure the voltage between front HFL-navigation-ANC microphone 7P connector terminal No. 1 and body ground.
FRONT HFL-NAVIGATION-ANC MICROPHONE 7P CONNECTOR
Wire side of female terminals
Is there less than 0.2 V? YES
-Go to step 2.
NO
-Repair an open or high resistance in the wire between the front HFL-navigation-ANC microphone and body ground (G501) (see page 22-34).
9. Turn the ignition switch to LOCK (0).
10. Disconnect the HandsFreeLink control unit 28P connector.
11. Disconnect the navigation unit connector C (16P).
12. Check for continuity between body ground and navigation unit connector C (16P) terminal No. 8 and No. 16 individually.
NAVIGATION UNIT CONNECTOR C (16P)
Wire side of female terminals
Is there continuity? YES
-There is a short to body ground in the wire(s) between the navigation unit and the front HFL-navigation-ANC microphone. Replace the affected shielded harness.
NO
-Goto step 13.
13. Check for continuity between navigation unit connector C (16P) terminals No. 8 and No. 16.
NAVIGATION UNIT CONNECTOR C (16P)
Wire side of female terminals
Is there continuity? YES
-There is a short in the wire(s) between the navigation unit and the front HFL-navigation-ANC microphone. Replace the affected shielded harness.
NO
-Go to step 14.
14. Check for continuity between navigation unit connector C terminal No. 8 to No 15 and No. 16, individually.
NAVIGATION UNIT CONNECTOR C (16P)
Is there continuity?
Is there continuity? YES
-There is a short in the wire(s) between the navigation unit and the front HFL-navigation-ANC microphone. Replace the affected shielded harness.
NO
-Substitute known-good components in this order until the problem goes away: • Front HFL-navigation-ANC microphone (see page 23-240).
• HandsFreeLink control unit (see page 23-281).
• Navigation unit (see page 23-238).
DVD read error messages
NOTE: • Check the vehicle battery condition first (see page 22-90).
• Make sure that the correct DVD color and version are installed.
• Confirm the correct DVD color and version is installed in the navigation unit (see page 23-135).
• Refer to General Troubleshooting for a list of common DVD screen error, messages and the probable causes . (see page 23-195).
• Check any official Honda service website for more service information about the navigation system.
• Go into the Diagnostic mode and use the ECU Info diagnostic (see page 23-182) to check the status of the DVD cover, • Inspect the navigation DVD for scratches or damage.
• The following troubleshooting is for the error message shown on the error messages table (see page 23495).
1. Check the DVD reading surface for scratches and fingerprints.
Are there any scratches or fingerprints on the DVD-ROM reading surface? YES-Clean or replace the DVD (see page 23-237).H NO-lf the problem occurs occasionally when the system is cold, this is normal. Ifthe problem occurs frequently when driving, replace the navigation unit (see page 23-238).
Navigation cannot control HVAC by voice command
NOTE: • Check the vehicle battery condition first (see page 22-90).
• Check the connectors for poor connections.-or loose terminals. • Check for and resolve all CAN DTCs before troubleshooting the navigation system. • If the Hard Error Code stored, check the Hard Error Code troubleshooting first.
• Before troubleshooting, make sure you have the . anti-theft codes for the audio system and the navigation system. • After troubleshooting, enter the anti-theft codes for the audio system and the navigation system.
• Verify that the correct navigation unit is installed for this model. Go into the Diagnostic mode and use Version (see page 23-192).
• Make sure that the correct DVD color and version are installed.
• Check any official Honda service website for more service information about the navigation system, 1. Connect the HDS to the DLC (see page 21-101).
2. Check for B-CAN or F-CAN DTCs in the data list.
Are there any DTCs in the B-CAN or F-CAN systems? YES
-Troubleshoot and repair all CAN related DTCs, and then retest.
NO
-Go to step 3.
3. Turn the ignition switch to ON (II).
4. Select the Self-Diagnosis Mode.
5. Check for error code in the Error History.
Are there any Hard Error Code stored? YES
~Refer to the Hard Error Code troubleshooting.
NO
-Go to step 6.
6. Substitute a known-good climate control unit (see page 21-190), and reconnect all connectors, and retest.
Does the symptom go away? YES
-Replace the original climate control unit (see page21-190).B NO
-Replace the navigation unit (see page 23-238).
Display day/night mode does not work or does not work properly
NOTE: • Turn the headlight, on and check that the dash brightness setting is not set to high.
• Check the connectors for poor connections or loose terminals.
• Always check for and resolve all CAN DTCs before troubleshooting the navigation system.
• Verify that the correct navigation unit is installed for this model. Go into the Self-Diagnostic Mode, and use Version (see page 23-192).
• Make sure that the correct DVD color and version are installed.
• Inspect the DVD for dirt or damage.
• Check any official Honda service website for more service information about the navigation system.
1. Turn the headlights on, and adjust the dash brightness up and down, then to the middle range.
Does the display change to day and night modes when turning the headlights on and off? YES-The system is OK at this time.
NO-Go to step 2.
2. Cover the sunlight sensor on the dash, then turn the headlights on and off.
Does the navigation display dim and brighten normally? YES
-The system is OK at this time.
NO
-Check the 1LL+ circuit for an open or short to ground between the navigation display unit to the gauge control module. If OK, substitute known-good units in this order, and recheck the system: • Navigation unit (see page 23-238) • Climate control unit (see page 21-190) • Gauge control module (see page 22-351)
System locks up or freezes constantly
NOTE: 9 Check the vehicle battery condition first (see page 22- 90).
• Check for connectors for poor connections or loose terminals.
• Always check for and resolve all CAN DTCs before troubleshooting the navigation system.
• Verify that the correct navigation unit is installed for this model. Go into the Self-Diagnostic Mode, and use Version (see page 23-192).
• Make sure that the correct DVD color and version are installed.
• Inspect the DVD for dirt or damage.
• Check any official Honda service website for more service information about the navigation system.
• Before troubleshooting, make sure you have anti-theft codes for the audio system and the navigation system.
• After troubleshooting, enter the anti-theft codes for the audio system and the navigation system.
• Check the DVD for damage or scratches.
1. Turn the ignition switch to ON (II).
2. Remove the DVD, and check the DVD reading surface for scratches and finger prints.
Are there any scratches or fingerprints on the DVD-ROM reading surface? YES
-Clean or replace the DVD-ROM (see page 23- 237) and recheck.
NO-
Go to step 3.
3. Turn the ignition switch to LOCK (0), and then back to ON (II).
Does the system reboot, lock up, or freeze? YES
-Replace the navigation unit (see page 23-238).
NO
-The system is OK at this time. Go into the Self-Diagnostic Mode, and use the Unit Check diagnosis (see page 23-182) to check the navigation unit and navigation display unit status. Ifthe status is NG, replace the affected units.
Vehicle icon wanders across the map when driving {does not follow a displayed road) or map or vehicle ICON spins
NOTE: • Check the vehicle battery condition first (see page 22-90).
• Check for connectors for poor connections or loose terminals.
• This is not the same condition as when driving off-road (or on a fire or logging road).
• This condition is caused by a loss of map matching from a bad sensor input. Check for aftermarket or other objects that can block the GPS signal. Always perform Map Matching (see page 23-133) before proceeding with the troubleshooting.
• Always check for and resolve all CAN DTCs before troubleshooting the navigation system.
• Verify that the correct navigation unit is installed for this model. Go into the Self-Diagnostic Mode, and use Version (see page 23-192).
В» Make sure that the correct DVD color and version are installed.
• Check for aftermarket metallic window tinting.
• Inspect the DVD for dirt or damage.
• Check any official Honda service website for more service information about the navigation system.
• Before troubleshooting, make sure you have the anti-theft codes for the audio system and the navigation system.
• After troubleshooting, enter the anti-theft codes for the audio system and the navigation system.
• Check the DVD for damage or scratches.
1. Check the GPS icon on the navigation screen.
Is the GPS icon white or missing?
YES-
Do the troubleshooting for GPS icon is white or not shown (see page 23-225).
NO
-Go to step 2.
2. Go into the Self-Diagnostic Mode, and use the Yaw Rate diagnosis (see page 23-190) to check the yaw rate sensor.
Is the yaw rate sensor OK? YES
-Go to step 3.
NO
-Replace the navigation unit (see page 23-238).
3. Go into the Self-Diagnostic Mode, and use the Car Status diagnosis (see page 23-191) to check the vehicle speed pulse (VSP) and the BACK signals.
Are the vehicle speed pulse and the BACK signals OK? YES
-The problem may be a characteristic of the system. Check to see if the problem occurs in the same place in a known-good vehicle. If it does, the problem could be in the database. Go to step 4.
NO-
• If the problem is the vehicle speed pulse, troubleshoot the vehicle speed signal circuit. LT BLU wire for an open or a short. If OK, swap a known-good ECM/PCM. If the problem or symptom goes away, update the ECM/PCM (see page 11-203) if it does not have the latest software or substitute a known-good ECM/PCM (see page 11 -204).
• If the BACK signal is indicated ON (1), when in any shift lever position other than reverse, troubleshoot the back-up light switch circuit (M/T) or MICU (A/T).
4. Substitute a known-good navigation unit (see page 23-238), and check to see if the problem occurs in the same place.
Does the problem occur in the same place? YES
-The problem is in the database and should be considered a characteristic of the system. Report the .
problem according to the Navigation System Owner's Manual under Reporting Errors and look for improvements in future databases.
NO
-Replace the navigation unit (see page 23-238).
Navigation system does not accept security code
NOTE; • Check the vehicle battery condition first (see page 22- 90).
• The system will not operate without the 4-digit security (anti-theft) code. Follow the this procedure.
(After 10 consecutive tries, you must cycle the key to continue trying) • The Navigation System Diagnosis and Core Return Form is available on ISIS, under Job aids, and can be printed out for recording this information. This information will help the reman facility determine what caused the failure.
• Always check for and resolve all CAN DTCs before troubleshooting the navigation system.
• Verify that the correct navigation unit is installed for this model. Go into the Self-Diagnostic Mode, and use Version (see page 23-192).
• Check connectors for pp,or connections or loose terminals.
• Before troubleshooting, make sure you have the anti-theft codes for the audio system and the navigation system.
• Make sure that the correct DVD color and version are installed.
•Inspect the DVD for dirt or damage.
•Check any official Honda service website for more service information about the navigation system.
1. Go into the Self-Diagnostic Mode, and use the ECU Info under the Unit Check diagnosis (see page 23- 182). A brief diagnosis runs for 20 seconds, and the serial number is displayed.
Is the serial number displayed? YES
-Go to step 4.
NO
-Go to step 2.
2. Remove the navigation unit (see page 23-238).
3. Check the serial number on the label on the underside of the navigation unit.
Is the serial number confirmed on the underside of the navigation unit? YES
-Go to step 4.
NO
-Replace the navigation unit (see page 23-238).
4. Using the serial number, look up the navigation security code in the Interactive Network (iN). (click: Service, Vehicle Information, Anti-Theft code Inquiry, and then select Navigation from the product dropdown box). Enter the serial number.
Is a 4-digit code displayed on the screen? YES
-Go to step 5.
NO
-Call the Warranty Department to obtain the code (the telephone number is in the PDI service bulletin).
Then go to step 5.
5. Check that the obtained code works to bypass the code screen in the navigation system.
Does the code work? YES
-The system is OK at this time. Return the vehicle to the customer and give them the anti-theft code.
NO
-Go to step 6.
6. Try entering four zeros (0000) as the code.
Do the four zeros work to bypass the code screen? YES
-Replace the navigation unit (see page 23-238), and enter Security code is 0000 in the problem description field of the core return form.
NO
-Replace the navigation unit (see page 23-238), and enter Won't take security code, in the problem description field of the core return form; (as proof, enclose the sticker that contains the serial number and the code).
Navigation display stays on with ignition - switch in LOCK (0)
NOTE: • Check for aftermarket accessories that may interfere with the navigation system.
• Check the connectors for poor connections or loose terminals.
• Before troubleshooting, make sure you have anti-theft codes for the audio system and the navigation system.
• After troubleshooting, enter the anti-theft codes for the audio system and the navigation system.
• The vehicle may have been used for a show event.
Check for a short jumper harness in-line with the navigation unit connector A (8P). If a jumper harness is present, remove it, and return it to Tech Line.
1. Remove the key from the ignition.
Does the navigation screen stay on? YES-
Go to step 2.
NO
-The system is OK at this time.
2. Measure the voltage between body ground and navigation unit connector A (8P) terminal No. 2.
NAVIGATION UNIT CONNETCOR A (8P)
Wire side of female terminals
Is there battery voltage? YES
-Repair a short to power in the wire between the driver's under-dash fuse/relay box and navigation unit connector A (8P).
NO
-Replace the navigation unit (see page 23-238).
Navigation cannot control audio system
Diagnostic Test: System Links
NOTE: • Check the vehicle battery condition first (see page 22- 90).
• Check for and resolve all CAN DTCs before troubleshooting the navigation system.
• Verify that the correct navigation unit is installed for this model. Go into the Self-Diagnostic Mode, and use Version (see page 23-192).
• Check for connectors for poor connections or loose terminals.
• Before troubleshooting, make sure you the have anti-theft codes for the audio system and the navigation system.
• After troubleshooting, enter the anti-theft codes for the audio system and the navigation system.
• Make sure that the correct DVD color and version are installed.
• Inspect the DVD for dirt or damage.
• Check any official Honda service website for more service information about the navigation system.
1. Turn the ignition switch to ON (II).
2. Make sure the anti-theft code for the audio system is entered.
3. Go into the Self-Diagnostic Mode, and use the Self-Diagnosis Mode (see page 23-176).
4. Check the system Links.
Is the Radio icon red? YES
-Do the troubleshooting for the Voice guidance cannot be heard, is broken up, or there is static (see page 23-225).
NO
-Go to step 5.
5. Substitute a known-good navigation unit (see page 23- 238), and recheck.
Can the navigation system control audio/disc? YES
-Replace the original navigation unit (see page 23-238).
NO
-Do the audio system troubleshooting.
Navigation cannot control KM radio
NOTE: • Check the vehicle battery condition first (see page 22- 90).
• Make sure that the correct DVD color and version are installed.
• Check any official Honda service website for more service information about the navigation system.
1. Start the vehicle.
2. Make sure the anti-theft code for the audio system is entered.
3. Go into the Self-Diagnostic Mode, and use the Self-Diagnosis Mode (see page 23-176).
4. Check the system Links.
Is the XM icon red? YES
-Do the troubleshooting for the Voice guidance cannot be heard, is broken up, or there is static (see page 23-225).
NO
-Go to step 5.
5. Substitute a known-good navigation unit (see page 23- 238).
Can the navigation system control XM radio? YES
-Replace the original navigation unit (see page 23-238J.
NO
-Replace the XM receiver (see page 23-120).
Navigation frequently asks for anti-theft code and/or needs GPS initialization
NOTE: • Check the vehicle battery condition first (see page 22-90).
• This is often caused by a loss of battery power or a poor ground.
• Make sure that the correct DVD color and version are installed.
•Check any official Honda service website for more service information about the navigation system.
1. Turn the ignition switch to ON (II).
2. Measure the voltage between navigation unit connector A (8P) terminal No. 4 and body ground.
NAVIGATION UNIT CONNETCOR A (8P)
Wire side of female terminals
Is there less than 0.2 V? YES
-Go to step 3.
NO
-Repair an open or high resistance in the wire between the navigation unit and body ground (G651) 4-door (see page 22-46), 2-door (see page 22-4S).
3. Measure the voltage between body ground and navigation unit connector A (8P) terminals No. 1 and No. 2 individually.
NAVIGATION UNIT CONNETCOR A (8P)
Wire side of female terminals
Is there battery voltage? YES
-Replace the navigation unit (see page 23-238).
NO
-Repair an open in the wire between the under-hood fuse relay box and the navigation unit. the ACC wire does not have voltage, repair an open in the wire between the under-dash fuse/relay box and the navigation unit.
The Acura Globe Screen (not the Honda Globe Screen) appears every time the vehicle is started
NOTE: The navigation DVD and the navigation unit are correct for the vehicle, but earlier and possibly later versions of the navigation software may have been installed. When this happens, the software may not be recognized by the navigation unit, and could cause the navigation unit to revert to a an Acura model profile.
1. Remove the navigation unit (see page 23-238) and verify that the part number printed on the navigation unit label is the correct one for the year/model vehicle you are working on.
Is the correct navigation unit installed based number? YES
-Go to step 2.
NO
-Replace the navigation unit with the correct unit for the year/model vehicle you are working on.
2. Reinstall the navigation unit.
3. Remove the navigation DVD.
4. Note the software version marked on the DVD label and verify if it is the correct version for the vehicle year/model you are working on by checking any official Honda service website, and searching for any related service information about the navigation system and navigation software.
Is the software version marked on the DVD correct one for the vehicle year/model you are on? YES-Replace the navigation unit (see page 23-238).
NO-Go to step 5.
5. Obtain the correct version DVD (see page 23-133) and install it.
Does the navigation system boot-up with the Globe Screen? YES
-The problem is resolved, troubleshooting is complete.
NO
-The system still shows Honda Globe Screen.
Replace the navigation unit (see page 23-238).
Navigation unit will not eject or accept the navigation DVD
1. Check the No. 15 (10 A) fuse in the under-hood fuse/relay box and the No. 18 (7.5 A) fuse in the driver's under-dash fuse/relay box.
Are the fuses OK? YES
-Go to step 2.
NO
-Replace the blown fuse(s), and recheck.
2. Turn the ignition switch to ON (II).
3. Eject the navigation DVD from the navigation unit (see page 23-237).
Does the navigation DVD eject?
YES
-Go t o step 4.
NO
-Go to step 5.
4. Reinsert the navigation DVD into the navigation unit.
Does the navigation unit accept the navigation DVD? YES
-No problems at this time, the system is normal.
Inspect for loose or poor connections at navigation unit connector A (SP) terminals No. 1, No. 2, and No. 4.
NO
-Replace the navigation unit (see page 23-238).
5. Measure the voltage between navigation unit connector A (8P) terminal No. 4 and body ground.
NAVIGATION UNIT CONNETCOR A (8P)
Wire side of female terminals
Is there less than 0.2 V? YES
-Go to step 6.
NO
-Repair an open or high resistance in the BLK wire between navigation unit connector A (8P) and body ground (G651) 4-door (see page 22-46), 2-door (see page 22-48).
6. Measure the voltage between body ground and navigation unit connector A (8P) terminal No. 1 and No. 2 individually.
NAVIGATION UNIT CONNETCOR A (8P)
Wire side of female terminals
Is there battery voltage? YES
-Replace the navigation unit (see page 23-238).
NO
-Repair an open in the wire between body ground and navigation unit connector A (8P) terminal No. 1 and the No. 15 (10 A) fuse in the under-hood fuse/relay box or navigation unit connector A (8P) terminal No. 2 and the No. 18 (7.5 A) fuse in the driver's under-dash fuse/relay box.
 DTC Troubleshooting
DTC 1001: FROM System info Error
NOTE:
• Check the vehicle battery condition first (see page
22- 9 0 ) .
• Before you troubleshoot, make sure to follow the
General Troubleshooting Inf ...
 Forced Starting of Display
Special Tools Required
SCS Service Connector 07PAZ-0010100
1. Turn the ignition switch to LOCK (0).
2. Connect the SCS service connector (A) to the
navigation service connector (B) located behin ...
See also:
Glove Box Lock Cylinder Replacement
NOTE: Take care not to scratch the glove box.
1. Remove the glove box (see page 20-174).
2. While lifting the glove box handle (A), pull out one
end of the retainer (B) with a hook-shaped tool ...
Front Door Latch Replacement
NOTE: Put on gloves to protect your hands.
1. Remove the door panel and the inner handle:
- 2-door ( s e e p a g e 20-12)
- 4-door (see page 20-17)
2. Remove the plastic cover, as needed (see st ...
System Description
VSA Modulator-Control Unit Inputs and Outputs for 36P Connector (Connector
Disconnected
Wire side of female terminals.
System Outline
This system i s composed of the VSA modulator-control u ...