 Honda Accord: Headlight Adjustment
Headlights become very hot during use; do not touch them or any attaching hardware immediately after they have been turned off.
Before adjusting the headlights: • Park the vehicle on a level surface.
• Make sure the tire pressures are correct.
• The driver or someone who weighs the same should sit in the driver's seat (or an equivalent amont of weight).
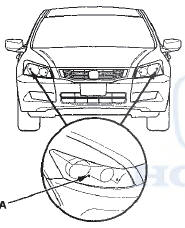
1. Clean the outer lens so that you can see the center (A) of the headlights.
2. Park the vehicle in front of a wall or a screen (A).
3. Turn the low beams on.
4. Determine if the headlights are aimed properly.
Vertical adjustment: Measure the height of the headlights (A).
Adjust the upper edge of the cut line (B) to the headlights' height.
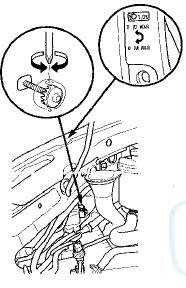
5. If necessary, open the hood and adjust the headlights by turning the vertical adjuster (A).
NOTE: The Ft and L adjusters are not applicable for USA models. The headlights can only be adjusted up and down.
4-door:
2-door:
 Combination Light Switch
Test/Replacement
Combination Light Switch
Test/Replacement
1. Remove the driver's dashboard lower cover (see page 20-166).
2. Remove the steering column covers (see page 17-10).
3. Disconnect the 12P connector (A) from the combination light switch (B).
...
 Headlight Replacement
4-door
1. Remove the parts shown.
• Upper fender trim (see page 20-277)
• Front bumper (see page 20-255)
• Front bumper absorber (see page 20-255)
2. Remove the three bolts, and ...
See also:
Rear Safing Sensor Replacement
Removal
1. Do the battery t e r m i n a l disconnection p r o c e d u r e (see
page 22-91), t h e n wait at least 3 minutes before
starting w o r k .
2. Remove t h e rear seat c u s h i o n (see ...
Handling the Unexpected
This chapter explains how to handle unexpected troubles. ...