 Honda Accord: Clutch Disassembly
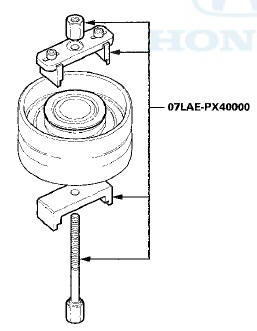
Special Tools Required
Clutch Spring Compressor Set 07LAE-PX40000
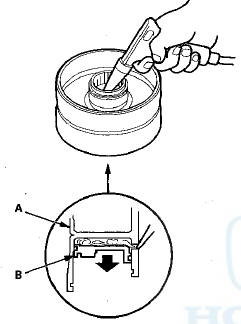
1. Remove the snap ring using a screwdriver.
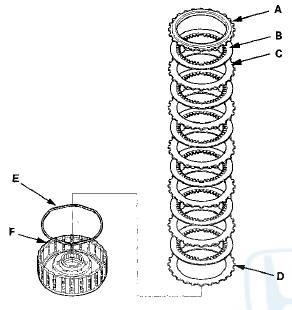
2. Remove the clutch end-plate (A), the clutch discs (B) (5), the clutch wave-plates (C) (4), the clutch flat-plate (D), and the waved spring (E) from the 1st clutch drum (F).
3. Make a reference mark on the clutch flat-plate.
4. Remove the clutch end-plate (A), the clutch discs (B) (6), the clutch wave-plates (C) (5), the clutch flat-plate (D), and the waved spring (E) from the 2nd clutch drum (F).
5. Make a reference mark on clutch the flat-plate.
6. Remove the clutch end-plate (A), the clutch discs (B) (6), the clutch wave-plates (C) (5), the clutch flat-plate (D), and the waved spring (E) from the 3rd clutch drum (F).
7. Make reference marks on the clutch flat-plate.
8. Remove the clutch end-plate (A), the clutch discs (B) (4), the clutch wave-plates (C) (4), and the waved spring (D) from the 4th clutch drum (E).

9. Remove the clutch end-plate (A), the clutch discs (B)
(4), the clutch wave-plates (C) (4), and the waved
spring (D) from the 5th clutch drum (E)
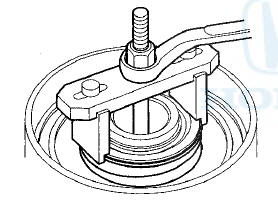
10. Install the clutch spring compressor.
11. Set the clutch spring compressor (A) on the spring
retainer (B) of the 1st, 2nd, and Srd clutches so that it
pushes on the clutch return spring (C).
12. Be sure the clutch spring compressor (A) is adjusted to make full contact with the spring retainer (B) on the 4th and 5th clutches.
13. Check the placement of the clutch spring compressor.
If either end of the clutch spring compressor is set over an area of the spring retainer which is unsupported by the return spring, the spring retainer may be damaged.
14. Compress the return spring until the snap ring can be removed.
15. Remove the snap ring using snap ring pliers.

18. Wrap a shop rag around the clutch drum (A), and apply air pressure to the fluid passage to remove the piston (B). Place a fingertip on the other passage while applying air pressure.
19.1st, 2nd, and 3rd clutches: Remove the clutch piston (A), then remove the O-ring (B) from the clutch piston, and remove the O-ring (C) from the clutch drum (D).
20.4th and 5th clutches: Remove the clutch piston (A), then remove the outer O-ring (B) and the inner O-ring (C) from the clutch piston.
 Idler Gear/Idler Gear Shaft
Replacement
Idler Gear/Idler Gear Shaft
Replacement
Special Tools Required
-Driver Handle, 15 x 135L 07749-0010000
-Attachment, 32 x 35 mm 07746-0010100
1. Remove the snap ring from the idler gear/idler shaft
assembly. Do not distort the snap ring. ...
 Clutch Inspection
1. Inspect the 4th and 5th clutch pistons and the clutch
piston check valves (A).
2. If the clutch piston check valve is loose or damaged,
replace the clutch piston.
3. Check the spring retain ...
See also:
Brake/Clutch Fluid
Use the same fluid for both the brakes and clutch.
• Checking the Brake Fluid
The fluid level should be between the MIN
and MAX marks on the side of the reservoir.
NOTICE
Brake fluid marke ...
DTC Troubleshooting
DTC B1775: Microphone input/Output Short to
Power/Open
NOTE: If you are troubleshooting multiple DTCs, be sure
to follow the instructions in B-CAN system diagnosis test
mode A (see page 22-134).
...
VTC Oil Control Solenoid Valve
Removal/Test/lnstallation
1 Disconnect the VTC oil control solenoid valve 2P
connector (A).
2. Remove the bolt (B) and the VTC oil control solenoid
valve (C).
3. Connect VTC oil control valve 2P connector terminal
No. ...