 Honda Accord: Customized Features
Use the audio/information screen to customize certain features.
• How to customize

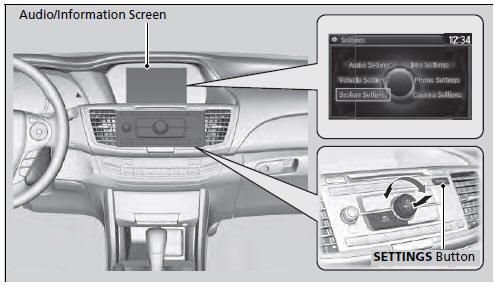
With the ignition switch is in ON
 , press the SETTINGS
button. Rotate
, press the SETTINGS
button. Rotate  to
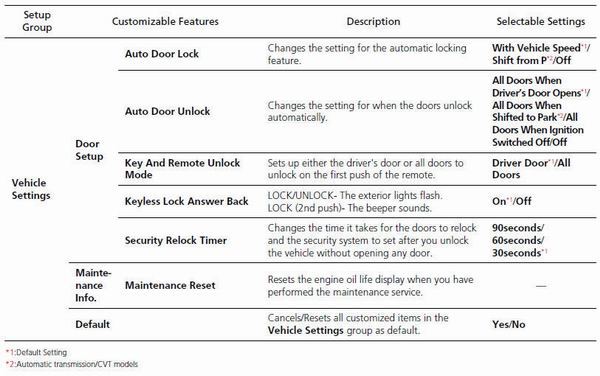
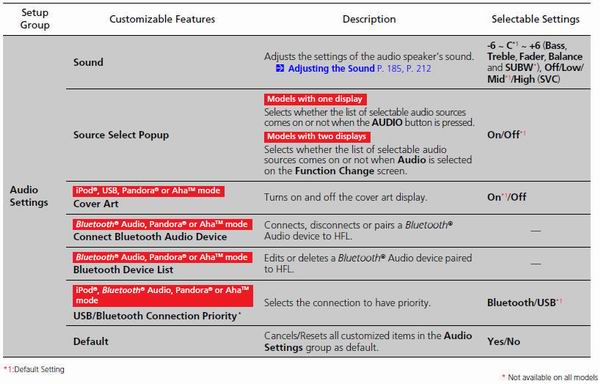
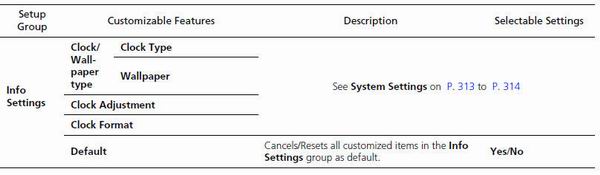
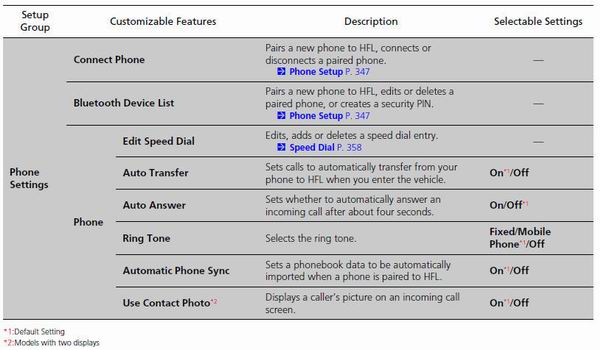
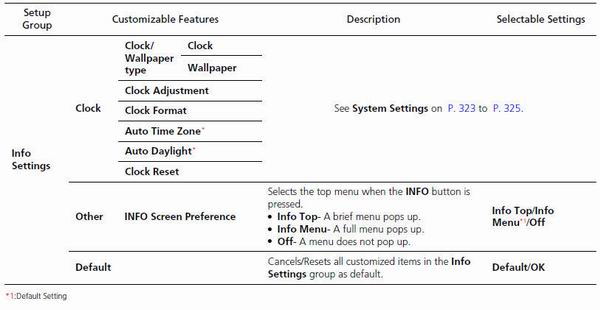
select Audio Settings, Phone Settings, Camera Settings, Vehicle Settings,
System Settings or Info Settings and press
to
select Audio Settings, Phone Settings, Camera Settings, Vehicle Settings,
System Settings or Info Settings and press
 .
.

When you customize settings:
• Make sure that the vehicle is at a complete stop.

• Shift to 

• Set the parking brake.
To customize other features, rotate
 , and press
 .
.

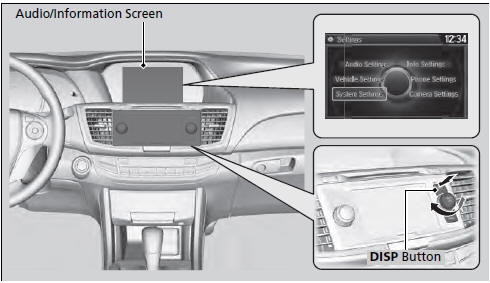
With the power mode in ON, press and hold the DISP button. Rotate
 to select
Audio Settings, Phone Settings, Camera Settings, Vehicle Settings, System
Settings or Info Settings and press
to select
Audio Settings, Phone Settings, Camera Settings, Vehicle Settings, System
Settings or Info Settings and press
 .
.
• How to customize

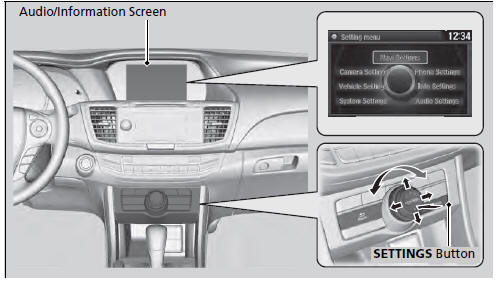
With the power mode in ON, press the SETTINGS button. Rotate
 to select
Audio Settings, Phone Settings, Camera Settings, Vehicle Settings, System
Settings, Info Settings, or Navi Settings and press
to select
Audio Settings, Phone Settings, Camera Settings, Vehicle Settings, System
Settings, Info Settings, or Navi Settings and press
 .
.

When you customize setting, make sure that the
vehicle is at a complete stop and shift to
 .
.
To customize other features, rotate
 , move

 or
or  and press
 .
.

• Customization flow
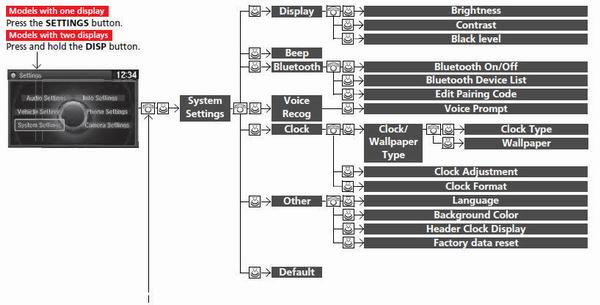
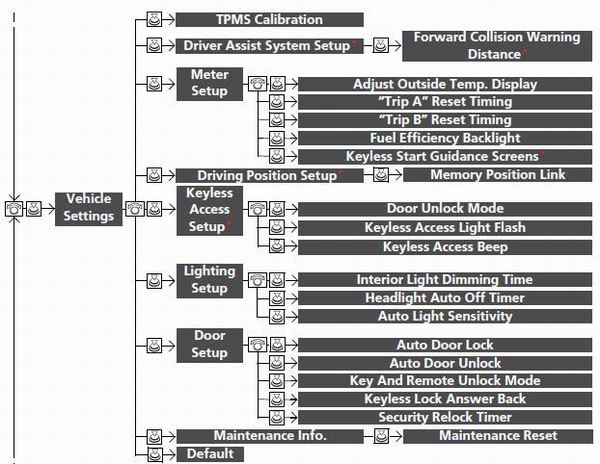
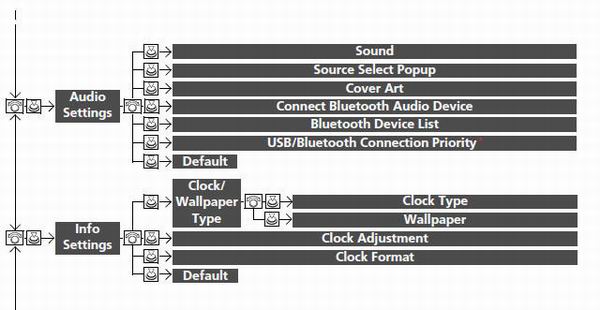
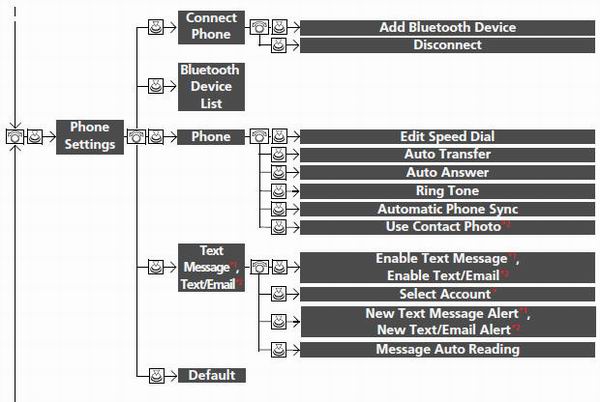
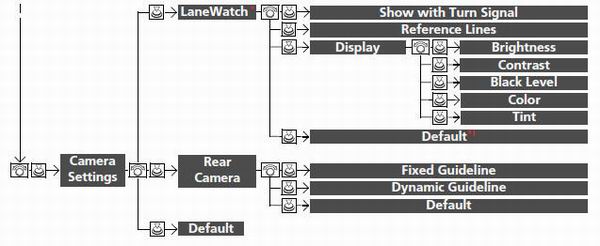

• Customization flow
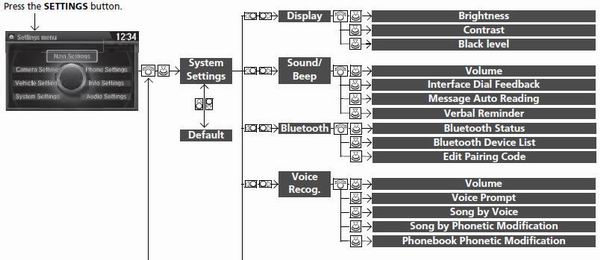
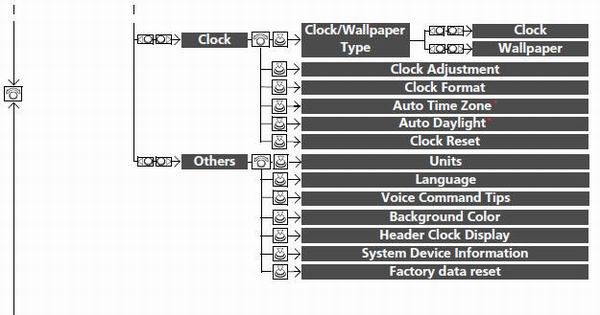
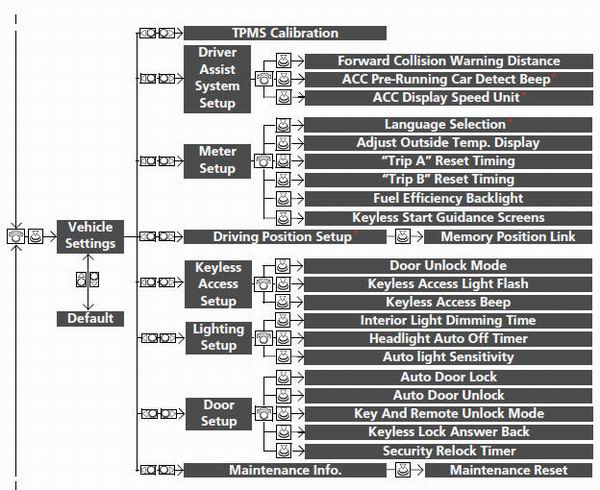
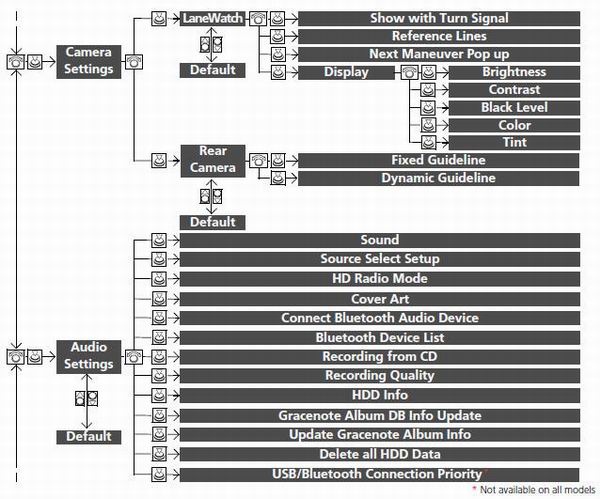

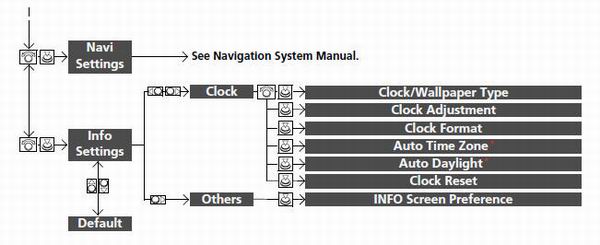
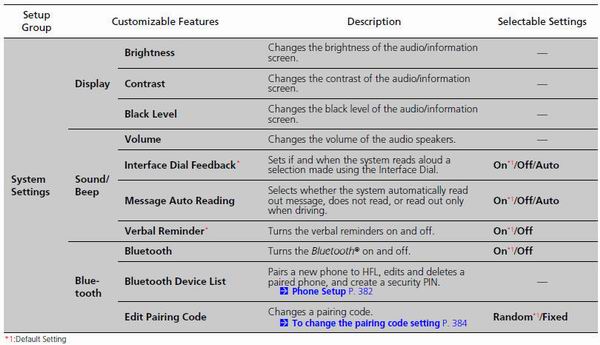
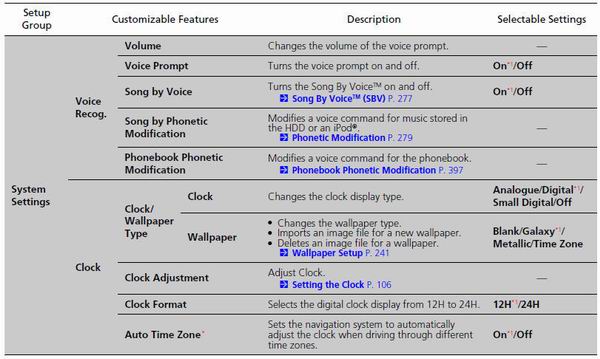
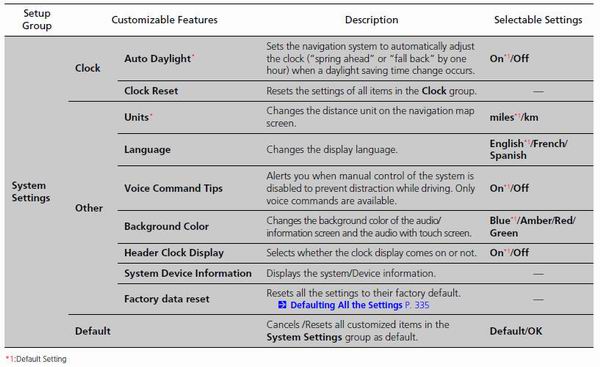
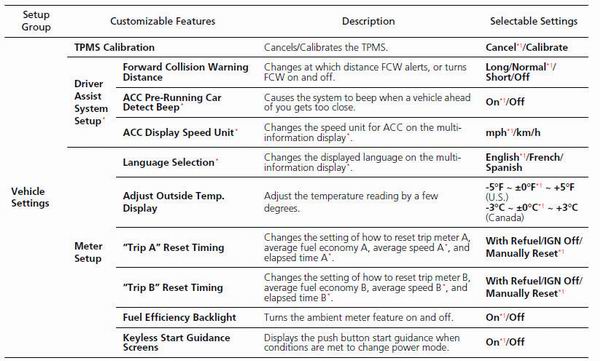
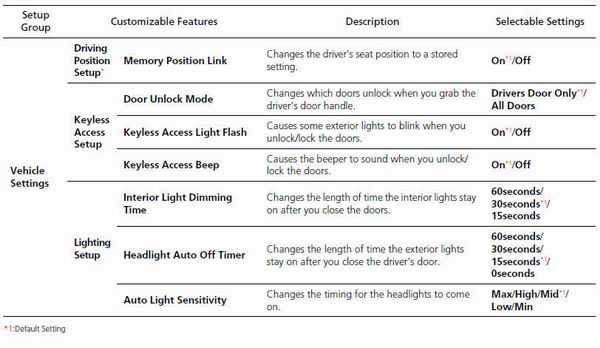
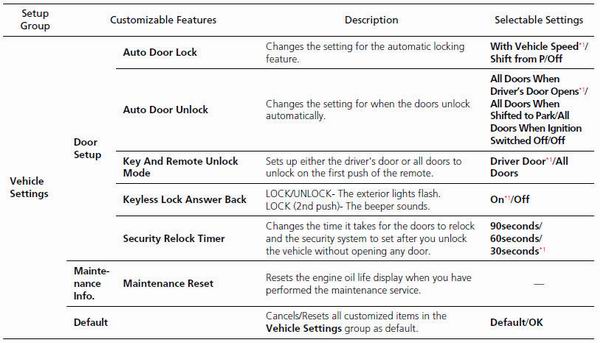
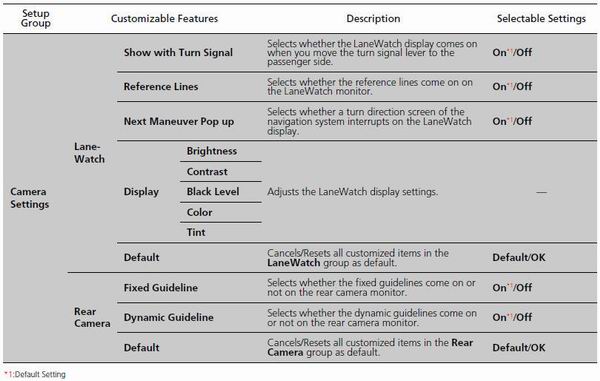
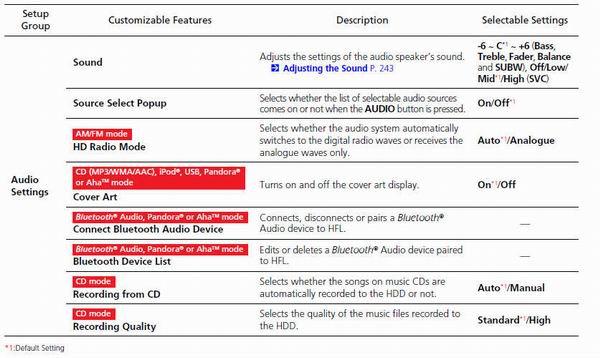
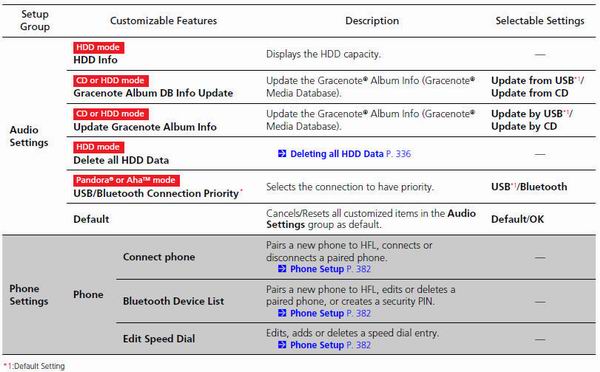
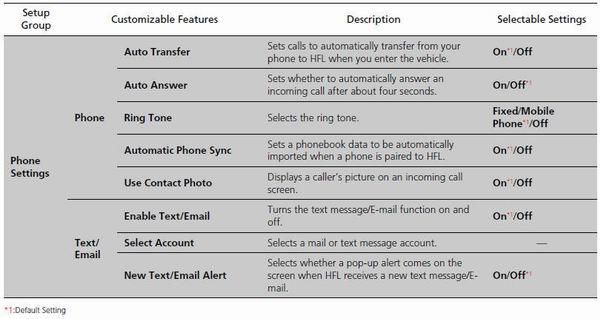
• List of customizable options

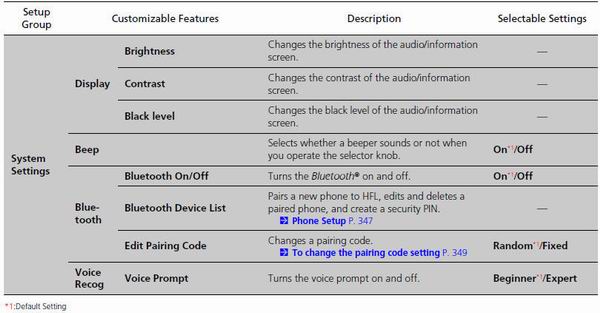
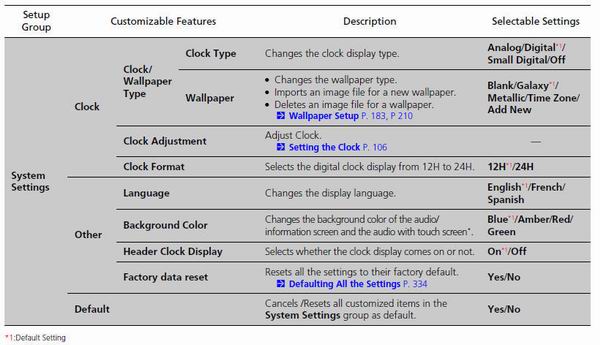

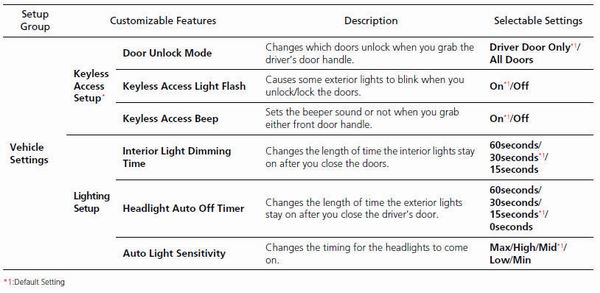
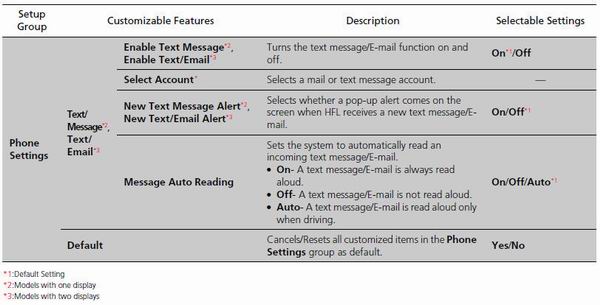
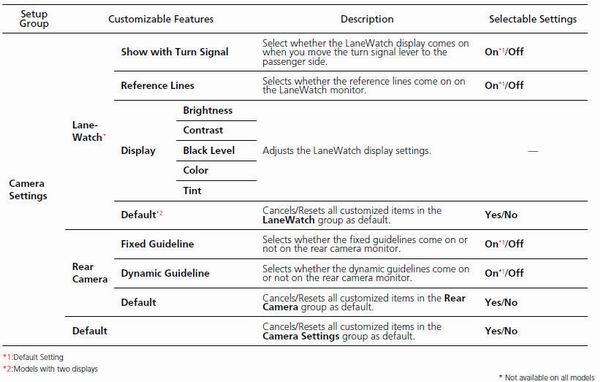
• List of customizable options


 Compatible iPod®, iPhone®, and USB Flash Drives
• iPod® and iPhone® Model Compatibility
This system may not work with all software versions
of these devices.
• USB Flash Drives
• Use a recommended USB flash drive of 256 MB or higher. ...
 Defaulting All the Settings
Reset all the menu and customized settings as the factory defaults.
1. Press the SETTINGS button.
1. Press and hold the DISP button.
2. Rotate to select System
Settings, then
press .
...
See also:
Paint Code
...
Countershaft Reassembly
Exploded View
*: The components of the triple cone synchro assembly.
Special Tools Required
-СћDriver Handle, 40 mm I.D. 07746-0030100
- Bearing Driver Attachment, 30 mm 07746-0030300
NOTE: R ...
Danger/Warning/Caution Label Locations
4-door Model
...