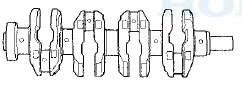
 Honda Accord: Crankshaft Inspection
Out-of-Round and Taper
1. Remove the crankshaft from the engine block (see page 7-14).
2. Remove the crankshaft position (CKP) pulse plate from the crankshaft (see page 7-30).
3. Clean the crankshaft oil passages with pipe cleaners or a suitable brush.
4. Clean the keyway and threads, and check for damage.
5. Measure the out-of-round at the middle of each rod and the main journal in two places. The difference between measurements on each journal must not be more than the service limit.
Journal Out-of-Round
Standard (New); 0.004 mm (0.0002 in) max.
Service Limit; 0.010 mm (0.0004 in)


6. Measure the taper at the edges of each rod and the main journal. The difference between measurements on each journal must not be more than the service limit.
Journal Taper
Standard (New): 0.005 mm (0.0002 in) max.
Service Limit: 0.010 mm (0.0004 in)
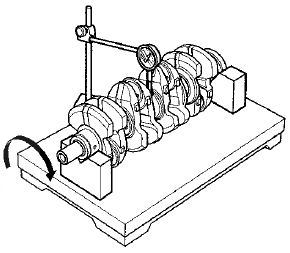
Straightness
7. Place the V-blocks on a flat surface.
8. Check the total runout with the crankshaft supported on V-blocks.
9. Measure the runout on all main journals. Rotate the crankshaft two complete revolutions. The difference between measurements on each journal must not be more than the service limit.
Crankshaft Total Runout
Standard (New): 0.03 mm (0.001 in) max.
Service Limit: 0.04 mm (0.002 in)
 Crankshaft and Piston Remowal
1 Remove the engine/transmission (see page 5-3).
2. Remove the transmission:
- Manual transmission (see page 13-7)
m Automatic transmission (see page 14-194)
3. M/T model: Remove the flywheel (s ...
 Block and Piston inspection
1. Remove the crankshaft and the pistons (see page
7-14).
2. Check the piston for distortion or cracks.
3. Measure the piston diameter at a point 13 mm (0.5 in)
from the bottom of the skirt. T ...
See also:
Alternator Removal and
Installation
Removal
1. Do the battery terminal disconnection procedure (see
page 22-91).
2. Remove the drive belt (see page 4-30).
3. Remove the two bolts securing the alternator.
4. Disconnect the alt ...
Transmission Fluid Pressure Switch B
(3rd Clutch) Replacement
1. Raise the vehicle on a lift, or apply the parking brake,
block both rear wheels, and raise the front of the
vehicle. Make sure it is securely supported.
2. Remove the splash shield.
3. Disc ...
Installing a Child Seat with a Tether
A child seat with a tether can be
installed in any seating position in
the back seat, using one of the
anchorage points shown above.
Since a tether can provide additional
security to the la ...