
 Honda Accord: Crankshaft and Piston Remowal
1 Remove the engine/transmission (see page 5-3).
2. Remove the transmission: - Manual transmission (see page 13-7) m Automatic transmission (see page 14-194) 3. M/T model: Remove the flywheel (see step 17 on page 12-18).
4. A/T model: Remove the drive plate (see page 14-204).
5. Remove the oil pan (see page 7-11).
6. Remove the oil pump (see page 8-17).
7. Remove the cylinder head: - All models except PZEV (see page 6-27) - PZEV model (see page 6-76) 8. Remove the baffle plate.
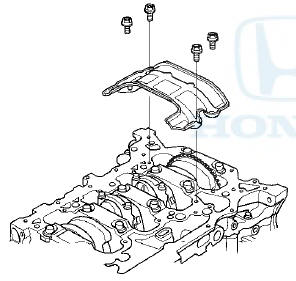
9. Remove the 8 mm bolts.
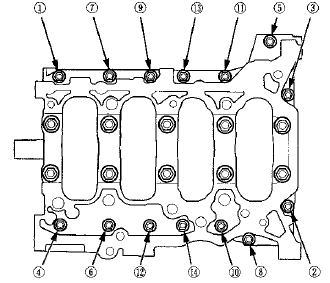
10. Remove the bearing cap bolts. To prevent warpage, loosen the bolts in sequence 1/3 turn at a time; repeat the sequence until all bolts are loosened.
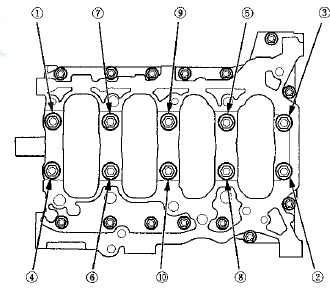
11. Remove the lower block and the bearings. Keep all the bearings in order.
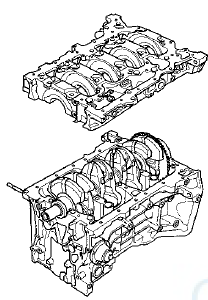
12. Remove the rod caps/bearings. Keep all the caps/bearings in order.
13. Lift the crankshaft out of the engine. Be careful not to damage the journals and the CKP pulse plate.
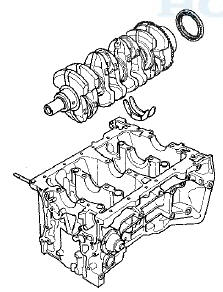
14. Remove the CKP pulse plate from the crankshaft (see page 7-30).
15. Remove the upper bearing halves from the connecting rods, and set them aside with their respective caps.
16. If you can feel a ridge of metal or hard carbon around the top of each cylinder, remove it with a ridge reamer (A). Follow the reamer manufacturer's instructions. If the ridge is not removed, it may damage the pistons as they are pushed out.
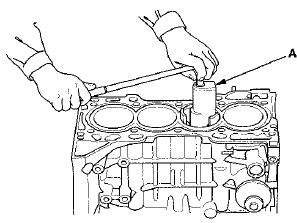
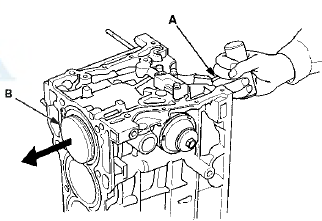
17. Use the wooden handle of a hammer (A) to drive out the piston/connecting rod assembly (B).
18. Reinstall the lower block and the bearings on the engine block in the proper order.
19. Reinstall the connecting rod bearings and the caps after removing each piston/connecting rod assembly.
20. Mark each piston/connecting rod assembly with its cylinder number to make sure they are reinstalled in the original order.
NOTE: The existing number on the connecting rod does not indicate its position in the engine, it indicates the rod bore size.
 Oil Pan Remowal
1. If the engine is already out of the vehicle, go to step
19.
2. Remove the strut brace (if equipped) (see page
20-306).
3. Do the battery removal procedure (see page 22-92).
4. Remove the ...
 Crankshaft Inspection
Out-of-Round and Taper
1. Remove the crankshaft from the engine block (see
page 7-14).
2. Remove the crankshaft position (CKP) pulse plate
from the crankshaft (see page 7-30).
3. Clean the cr ...
See also:
System Charging
• Air conditioning refrigerant or lubricant vapor can
irritate your eyes, nose, or throat.
• Be careful when connecting service equipment.
• Do not breathe refrigerant or vapor.
...
Windshield Replacement
NOTE:
- Put on gloves to protect your hands.
- Wear eye protection while cutting glass adhesive with
a piano wire.
- Use seat covers to avoid damaging any surfaces.
- Glass adhesive can be ...
Cylinder Head Inspection for
Warpage
1. Remove the cylinder head (see page 6-76).
2. Inspect the camshaft (see page 6-84).
3. Check the cylinder head for warpage. Measure along
the edges, and three ways across the center.
- If ...