 Honda Accord: Rearview Mirror Replacement
Without Automatic Dimming Mirror
1. Turn the rearview mirror base (A) 90 В°.
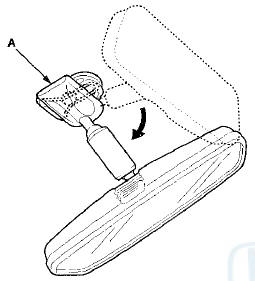
2. Slide the rearview mirror base (A) down toward the bottom of the windshield to detach it from the spring (B) in the mount (C).
3. If necessary, remove the spring from the mount.
4. Install the rearview mirror in the reverse order of removal.
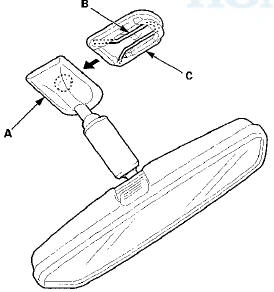
With Automatic Dimming Mirror
1. Pry out the rearview mirror harness cover (A) to release the hooks (B), then slide the cover rearward, and remove the cover by releasing the hooks (C) of the rearview mirror harness cover base (D).
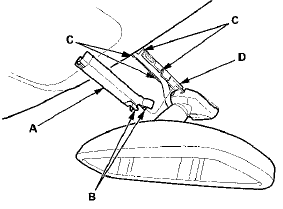
2. Disconnect the rearview mirror connector (A).
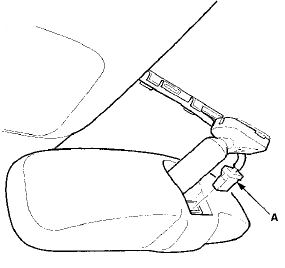
3. Loosen the TORX screw with a TORX T20 bit, then slide the rearview mirror (A) rearward and off the mount (B).
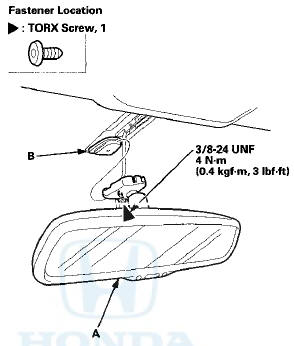
4. Install the mirror in the reverse order of removal, and note these items: - Before installing the mirror, remove the TORX screw, and apply medium strength liquid thread lock to it.
- Make sure the connector is plugged in properly.
- Push the hooks into place securely
 Mirror Housing Cover Replacement
1. Remove the mirror holder (see page 20-63).
2. From the mirror holder opening, release the hooks (A)
of the mirror housing cover (B).
3. Release the hooks (A), then remove the mirror
housing ...
 Glass
Glass
...
See also:
Information Display
Information Display
The information display shows the
odometer, trip meter, engine oil life,
outside temperature (if equipped),
and maintenance item code(s).
To switch the display, press and ...
Control Locations
Control Locations ...
Playing a CD
Your audio system supports audio CDs, CD-Rs and CD-RWs in either MP3, WMA, or
AAC*1 format. With the CD loaded, select the CD mode.
• How to Select a File from the Music Search List
(MP3/WMA/ ...