 Honda Accord: Rear Door Outer Molding
Replacement
Honda Accord: Rear Door Outer Molding
Replacement
Special Tools Required
KTC Trim Tool Set SOJATP2014*
- Available through the Honda Tool and Equipment Program; call 888-424-6857
4-door
N O T E : - If you remove the door outer molding, replace it with a new one because it will bend during removal.
- Put on gloves to protect your hands.
- Take care not to scratch the door.
- Use the appropriate tool from the KTC trim tool set to avoid damage when removing components.
1. Detach the clips (A) with a clip remover, then pull back romn\/o th (C, D).
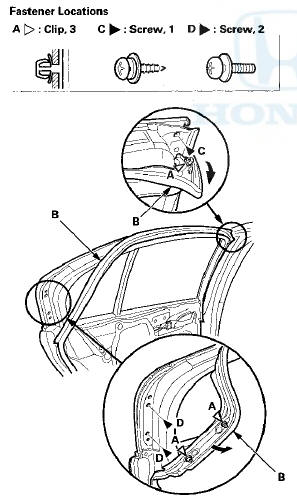
2. Pull out the upper edge of the door outer molding (A) from the edge of the sash, and cut the double-sided adhesive tape (B) with a utility knife, then remove the molding from the sash, and remove the molding from between the door glass outer weatherstrip (C) and the door.
3. Scrape off remaining double-sided adhesive tape from the sash, then clean the sash surface with a shop towel dampened in isopropyl alcohol.
4. Install the door outer molding in the reverse order of removal, and note these items: - Insert the rear edge of the molding between the door glass outer weatherstrip and the door properly.
- Push adhesive areas into place securely.
- Make sure the upper and lower sides of the molding are catching the edges of the sash properly.
- Push the clips into place securely.
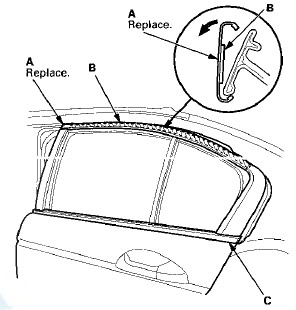
 Rear Door Glass Outer Weatherstrip
Replacement
Rear Door Glass Outer Weatherstrip
Replacement
4-door
NOTE:
- Put on gloves to protect your hands.
- Take care not to scratch the door.
1. Remove these items:
- Door panel {see page 20-38)
- Plastic cover, as needed (see step 3 on page 2 ...
 Rear Door Weatherstrip Replacement
4-door
NOTE;
- Put on gloves to protect your hands.
- Take care not to scratch the door.
- Take care not to damage the front upper
corner clip
(black) and the rear upper corner clips (black ...
See also:
Adjusting the Sound
BASS, TREBLE, FADER, and
BALANCE are each adjustable. You
can also adjust the strength of the
sound coming from the subwoofer
speaker. In addition, you can set the
speed-sensitive volume
c ...
Countershaft Disassembly
NOTE: Refer to the Exploded View in the Countershaft
Reassembly, as needed, when removing components
pressed onto the countershaft (see page 13-46).
1. Securely clamp the countershaft assembly In ...
USB Port
Install the iPod® dock connector or the USB
flash drive to the USB port.
• Do not leave the iPod® or USB flash drive in the
vehicle. Direct sunlight and high temperatures may
damage it.
...