 Honda Accord: Trunk Lid Opener/Fuel Fill Door Opener
Replacement
Honda Accord: Trunk Lid Opener/Fuel Fill Door Opener
Replacement
Special Toots Required
KTC Trim Tool Set SOJATP2014*
*Available through the Honda Tool and Equipment Program; call 888-424-6857
NOTE: - Put on gloves to protect your hands.
- Take care not to scratch the rear bumper.
- Use the appropriate tool from the KTC trim tool set to avoid damage when removing components.
- Take care not to kink the trunk lid opener cable/fuel fill door opener cable.
1. Pry out the bottom edge of the front side cap (A) at the notch with the trim tool to release the hooks (B), and release the hooks (C), then remove the cap from the front door sill trim (D).
2. Remove the opener lock cylinder (E), and loosen the bolt.
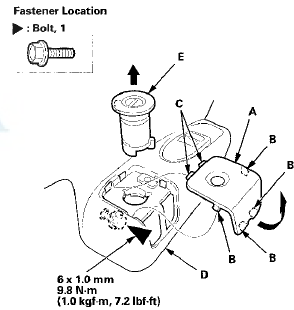
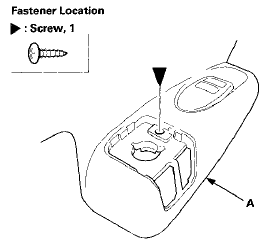
3. Remove the screw securing the front door sill trim (A) and the trunk lid opener/fuel fill door opener.
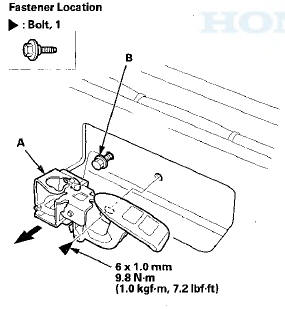
4. Remove the front door sill trim: - 2-door (see page 20-105) - 4-door (see page 20-107) 5. Remove the bolt, then remove the trunk lid opener/fuel fill door opener (A) from the bolt (B).
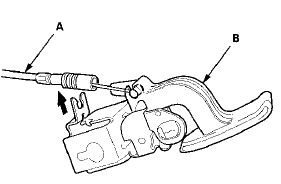
6. Disconnect the trunk lid opener/fuel fill door opener cable (A), then remove the opener (B).
7. Install the opener in the reverse order of removal, and note these items: - Make sure the opener cable is connected properly.
- Make sure the trunk lid and the fuel fill door open properly and lock securely.
- Fix at the original position in the outer end of the cable on the trunk lid opener/fuel fill door opener securely. And check the trunk lid latch operation: Make sure the trunk lid latch and the fuel fill door latch unlock when pulling and pushing the trunk lid opener/fuel fill door opener. If necessary, adjust the position of the cable end.
- Before tightening the opener mounting rear bolt, position the front door sill trim against the opener certainly by screwing the trim onto the opener.
 Hood Release Handle Replacement
NOTE:
- Put on gloves to protect your hands.
- Take care not to scratch the body.
-Take care not to kink the hood opener
cable.
1. Remove the driver's kick panel:
- 2-door (see page 20-10 ...
 Trunk Lid Latch Replacement
Special Tools Required
KTC Trim Too! Set SOJATP2014*
*Available through the Honda Tool and
Equipment
Program; call 888-424-6857
NOTE:
- Put on gloves to protect your hands.
- Take care not t ...
See also:
Brake/Clutch Fluid
Use the same fluid for both the brakes and clutch.
• Checking the Brake Fluid
The fluid level should be between the MIN
and MAX marks on the side of the reservoir.
NOTICE
Brake fluid marke ...
How Your Front Airbags Work
If you ever have a moderate to
severe frontal collision, sensors will
detect the vehicle’s rapid
deceleration.
If the rate of deceleration is high
enough, the control unit will inflate
...
Shift Solenoid Valve Removal and
Installation
NOTE:
-Do not hold the shift solenoid valve connector to
remove and to install the shift solenoid valves. Hold
the shift solenoid valve b o d y .
-Do not install the shift solenoid valve A before ...