
 Honda Accord: System Description
The vehicle is equipped with a Type Vll (GEN 5) immobilizer system that will disable the vehicle unless a programmed ignition key is used.
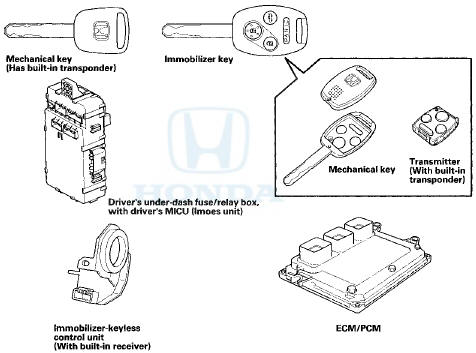
This system consists of a transponder combined with a keyless transmitter, an immobilizer-keyless control unit (Has built-in receiver), the driver's MICU (has built-in imoes unit), an immobilizer indicator, and the ECM/PCM.
When the immobilizer key (programmed by the HDS) is inserted into the ignition switch and turned to ON (II), the immobilizer-keyless control unit sends power to the transponder. The transponder then sends a coded signal back to the immobilizer-keyless control unit which then sends a coded signal to the ECM/PCM and the driver's MICU (imoes unit).
The ECM/PCM and driver's MICU (imoes unit) identify this coded signal, then voltage is supplied to the fuel pump.
If the wrong key has been used or the code was not received or recognized s, the indicator will flash once, then it will blink until the ignition switch is turned to LOCK (0). When the ignition switch is turned to the LOCK (0) position, the indicator will blink ten times to signal that unit has reset correctly, then the indicator will go off.

 Circuit Diagram
...
See also:
Audio Unit Removal/Installation
With Navigation
SRS components are located in this area. Review the
SRS component locations (see page 24-23), and the
precautions and procedures (see page 24-25) before
doing repairs or service.
...
Manual Transmission
4-cylinder models
Check the fluid level with the
transmission at normal operating
temperature and the vehicle sitting
on level ground.
To check the transmission fluid level,
remove the und ...
Supplemental restraint system (SRS) (if steering maintenance is required)
The Accord SRS includes a driver's airbag in the steering wheel hub, a
passenger's airbag in the dashboard
above the glove box, seat belt tensioners in the front seat belt retractors,
side curtai ...