 Honda Accord: Shift Lock Solenoid Test
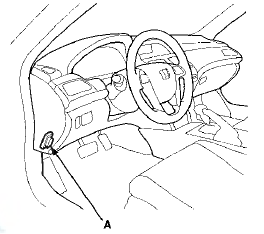
1. Connect the HDS to the DLC (A) located under the driver's side of the dashboard.
2. Turn the ignition switch to ON (II). Make sure the HDS communicates with the PCM. If it does not, go to the DLC circuit troubleshooting (see page 11-181).
3. Select Shift Lock Solenoid Test in the Miscellaneous Test Menu, and check that the shift lock solenoid operates with the HDS.
4. Check that the shift lever can be moved out of P when the Shift Lock Solenoid is ON. Move the shift lever back to P, and check that it locks with the Shift Lock Solenoid is OFF.
5. Check that the shift lock releases when the shift lock release is pushed, and check that it locks when the shift lock release is released.
6. If the shift lock solenoid does not work properly, go to the shift lock system troubleshooting (see page 14-249).
 Shift Lock System Circuit
Troubleshooting
Shift Lock System Circuit
Troubleshooting
1. Connect the HDS to the DLC (A) located under the
driver's side of the dashboard.
2. Turn the ignition switch to ON (II). Make sure the HDS
communicates with the PCM. If it does not, go to the
...
 Shift Lock Solenoid Replacement
Type A Shift Lever
1. Remove the shift lever assembly (see page 14-222).
2. Release the lock tabs (A) retaining the shift lock
solenoid using thin-bladed screwdrivers.
3. Insert a 6.0 mm (0.24 ...
See also:
Cruise Control Combination
Switch Test/Replacement
SRS components are located in this area. Review the
SRS component locations:
2-door fsee page 24-23)
4-door (see page 24-21)
Precautions and procedures (see page 24-25), in the SRS
before d ...
Front Passenger's Airbag Replacement
NOTE: If r e p l a c i n g t h e f r o n t passenger's airbag after
d e p l o y m e n t , refer t o Component Replacement/
Inspection A f t e r Deployment (see page 24-208) f o r a
c o m p l e t e ...
Relays
Power Relay Test
Special Tools Required
Relay Puller 07AAC-000A1A0
Use this chart to identify the type of relay, then do the
test listed for it.
*1:'08-09 models
*2: Carefully remove the relay ...