
 Honda Accord: Rear Seat Cushion Cover
Replacement
NOTE: -Put on gloves to protect your hands.
- Take care not to tear or damage the seat covers.
1. Remove the seat cushion (see page 20-241).
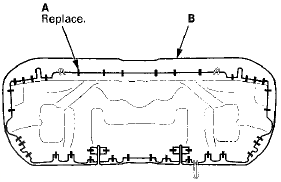
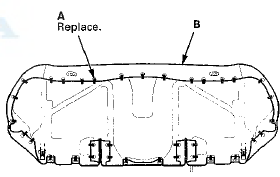
2. From the back of the seat-back, release all the upholstery rings (A), and fold back the seat cushion cover (B).
2-door
4-door
3. Pull back the edge of the seat cushion cover (A) all the way around, and release the upholstery rings (B), and release the hooks (C) of the lateral wires (D) from the longitudinal wires (E) on the pad, then remove the seat cushion cover.
NOTE: The leather seat cushion cover is shown; the other types of the seat cushion cover are similar.
2-door
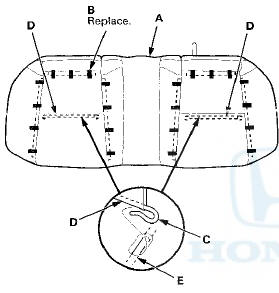
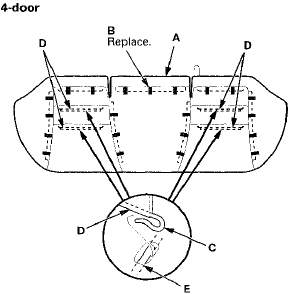
4. Install the cushion cover in the reverse order of removal, and note these items: - To prevent wrinkles when installing the seat cushion cover, make sure the material is stretched evenly over the pad before securing the upholstery rings.
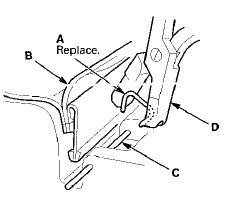
- Replace all of the upholstery rings (A) fastening the seat cushion cover (B) to the pad wires (C) with new ones using commercially available upholstery ring pliers (D).
 Rear Seat Side Bolster Cover
Replacement
4-door
NOTE: Take care not to tear or damage the seat covers.
1. Remove the seat side bolster (see page 20-242).
2. Release all the hook strips (A), fold back the seat side
bolster cover (B), ...
 Bumpers
...
See also:
Playing XM® Radio
• To Play the XM® Radio
1. Select the XM® mode.
2. Press the MENU button.
3. Rotate to select XM Tune
Mode, then press .
4. Rotate to select Channel
Mode or Category Mode, then p ...
Lift and Support Points
NOTE: If you are going to remove heavy components
such as suspension or the fuel tank from the rear of the
vehicle, first support the front of the vehicle with tall
safety stands. When substantial ...
Master Cylinder Inspection
1. Remove the master cylinder (see page 19-26).
2. Inspect and note these items:
- Before reassembling, check that all parts are free of
dirt and other foreign particles.
- Do not try to disas ...