 Honda Accord: Oil Seal Replacement
Special Tools Required
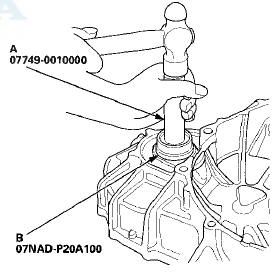
- Driver Handle, 15 x 135L 07749-0010000
- Oil Seal Driver Attachment 07NAD-P20A100
1. Remove the oil seal (A) from the transmission housing (B).
NOTE: Be careful not to damage the transmission housing while removing the oil seal.
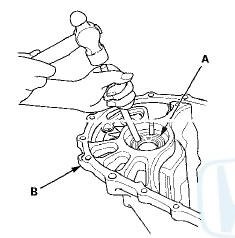
2. Remove the oil seal (A) from the clutch housing (B).
NOTE: Be careful not to damage the clutch housing while removing the oil seal.
3. Install a new oil seal flush with the transmission housing using the 15 x 135L driver handle (A) and the oil seal driver attachment (B).
4. Install a new oil seal flush with clutch housing using the 15 x 135L driver handle (A) and the oil seal driver attachment (B).
 Carrier Bearing Replacement
Special Tools Required
Driver Handle, 40 mm I.D. 07746-0030100
1. Check the carrier bearings for wear and rough
rotation. If they rotate smoothly and their rollers show
no signs of wear, the beari ...
 Differential Thrust Clearance Adjustment
Special Tools Required
Driver Handle, 40 mm I.D. 07746-0030100
1 Remove trie left driveshaft side oil seal from the
transmission housing (see page 13-70).
2. If you removed the 80 mm shim from t ...
See also:
Center Pocket Removal/Installation
Without Navigation System
NOTE;
- Take care not to scratch the dashboard or the related
parts.
- A/T is shown; M/T is similar.
1. Remove the center console panel (see page 20-157).
2. A/T: ...
Engine Removal
Special Tools Required
. Universal Lifting Eyelet 07AAK-SNAA120
Engine Hanger Adapter VSB02C000015*
- Engine Support Hanger, A and Reds AAR-T1256*
- Subframe Adapter VSB02C000016*
*Available thro ...