 Honda Accord: Dynamic Damper Replacement
1. Remove the Inboard joint (see page 16-7).
2. Remove the dynamic damper band (see step 1 on page 16-7).
3. Remove the dynamic damper (A).
Left driveshaft
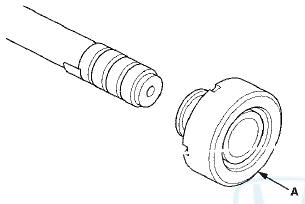
Right driveshaft
4. Install a new dynamic damper.
NOTE; Be careful not to swap the dynamic dampers.
Check the type of dynamic damper by its shape.
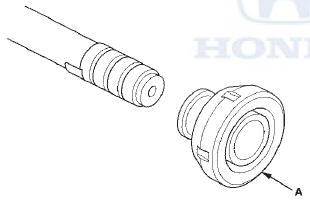
5. Adjust the specified distance (A) between the outboard joint side and the dynamic damper edge.
NOTE: Check the type of dynamic damper by its shape.
Left driveshaft
A: 298.5-303.5 mm (11.75-11.95 in)
Right driveshaft
A: 292.5-297.5 mm (11.52-11.71 in)
6. Install the dynamic damper band (see step 10 on page 16-14).
7. Install the inboard joint (see page 16-12).
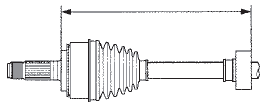
 Driveshaft Disassembly
Special'Tools Required
•Threaded Adapter, 26 x 1.5 mm
07XAC-001030A
-Slide Hammer 5/8M-18 UNF, commercially available
-Bearing Puller, commercially available
-Boot Band Pliers, commercially ...
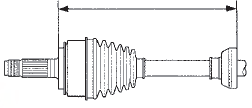
 Driveshaft Reassembly
Exploded View
Special Tools Required
-Boot Band Tool KD-3191 or equivalent, commercially
available
•Seal Clamp Tool Kent-Moore J-35910 or
equivalent,
commercially available
-Boot Band P ...
See also:
Oil Pressure Switch Test
1 Disconnect the oil pressure switch connector (A) from
the oil pressure switch (B).
2. Check for continuity between the oil pressure switch
terminal and the engine (ground). There should be
con ...
Engine Oil Gallery Cap Replacement
1. Remove the harness bracket (A), then remove the
engine oil gallery cap (B).
2. Clean the O-ring groove and mating surface with the
engine oil gallery cap.
3. Apply new engine oil to new O-r ...
Intermediate Shaft Installation
1. Clean the areas where the Intermediate shaft contacts
the differential thoroughly with solvent, and dry then
with compressed air.
NOTE: Do not wash the rubber parts with solvent.
2. Install ...