 Honda Accord: Disc Scan
When you press the SCAN side of the SCAN/A. SEL bar repeatedly until you see D-SCAN in the center display, or push the interface selector to the right, the first track of the current disc plays for about 10 seconds. You will see SCAN next to DISC on the screen. The disc number is blinking and SCAN is also shown in the center display. To listen to the rest of the disc, press and hold the SCAN side of the bar until you hear a beep, or push the interface selector to the right again within 10 seconds.
If you don’t, the system advances to the next disc, plays about 10 seconds of its first track, and continues through the rest of the discs the same way. When the system reaches the last disc, DISC SCAN is canceled, and that disc continues to play.
To Select Repeat or Random Mode:
You can select any type of repeat and random modes by using the interface dial.
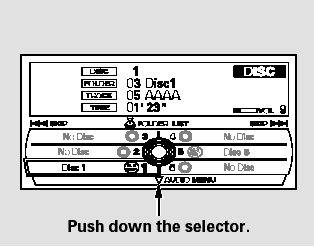
Push the AUDIO button to display the audio information on the screen, then scroll down by pushing down the selector to select the audio menu.
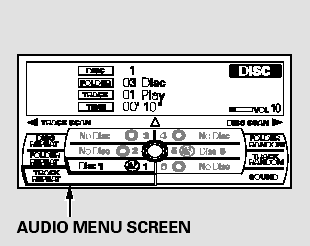
Turn the interface knob to select a desired repeat or random mode, then press ENTER to set your selection.
To cancel the selected repeat or random mode, have the selected mode highlighted, then press ENTER on the interface selector.
 Track Scan
When you press the SCAN side of
the SCAN/A. SEL bar or scroll down
and push the interface selector to
the left, the next track of the current
track plays for about 10 seconds.
You will see SC ...
 Track Repeat
To replay the current track
continuously, select TRACK
REPEAT, and press ENTER on the
interface selector. As a reminder,
you will see REPEAT next to
TRACK on the screen. To turn this
featu ...
See also:
Special Tools
...
System Description
VSA Modulator-Control Unit Inputs and Outputs for 36P Connector (Connector
Disconnected
Wire side of female terminals.
System Outline
This system i s composed of the VSA modulator-control u ...
Recirculation Control Motor Circuit
Troubleshooting
908-09 models 4-door with A/T and '10 model
with AT
1. Check the No. 16 (7.5 A) fuse in the driver's
under-dash fuse/ relay box.
Is the fuse OK?
YES-Go to step 2.
NO-Replace the fuse, and re ...