 Honda Accord: Active Noise Cancellation
Microphone
Removal/Installation
Honda Accord: Active Noise Cancellation
Microphone
Removal/Installation
Front
1. Remove the roof console (see page 20-140), and disconnect the connector (A) from the front active noise cancellation microphone (B).
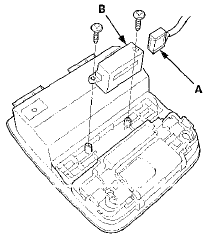
2. Remove the screws and the front active noise cancellation microphone.
3. Install the microphone in the reverse order of removal.
Rear
1. Remove the rear shelf (see page 20-128).
2. Disconnect the connector (A), then remove the screws and the rear active noise cancellation microphone (B).
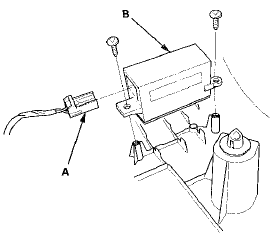
3. Install the microphone in the reverse order of removal.
 XM Receiver Removal/Installation
1. Open the trunk lid, and remove the right trunk side
trim panel {see page 20-132).
2. Disconnect the connectors (A) from the XM receiver
(B).
4-Door
3. Remove the mounting bolt (C) and lo ...
 Crossover Network Control Unit
Removal/Installation
Crossover Network Control Unit
Removal/Installation
Driver's Door Speaker Crossover Network
Control Unit
1. Remove the driver's dashboard lower cover (see page
20-166).
2. Disconnect the connector (A), then remove the
driver's door speaker cross ...
See also:
Rear Brake Disc Inspection
Runout
1. Raise and support the vehicle (see page 1-13).
2. Remove the rear wheels.
3. Remove the brake pads (see page 19-31),
4. Inspect the brake disc to wheel surface for damage
and cracks ...
Rear Brake Pad Inspection and Replacement
CAUTION
Frequent inhalation of brake pad dust, regardless of
material composition, could be hazardous to your
health.
- Avoid breathing dust particles.
-Never use an air hose or brush to clea ...
Output Shaft (Countershaft) Speed
Sensor Replacement
NOTE: For A/T models (see page 14-188).
M/T
1. Disconnect the output shaft (countershaft) speed
sensor 3P connector (A).
2. Remove the output shaft (countershaft) speed sensor
(B).
3. Instal ...