 Honda Accord: Recirculation Control Motor Test
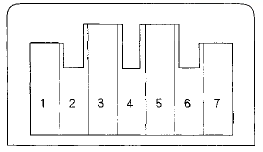
'08-09 models 4-door with A/T and "10 model with A/T
NOTE: Before testing the motor, check for HVAC DTCs (see page 21-9).
1. Disconnect the 7P connector from the recirculation control motor.

Incorrectly applying power and ground to the recirculation control motor will damage it. Follow the instructions carefully.
2. Connect battery power to terminal No. 1 of the recirculation control motor, and ground either terminal No. 5 or No. 7; the recirculation control motor should run smoothly. To avoid damaging the recirculation control motor, do not reverse power and ground immediately when the motor stops.
Disconnect terminal No. 5 or No. 7 from ground; the recirculation control motor should stop at Fresh (when terminal No. 7 is disconnected) or Recirculate (when terminal No. 5 is disconnected). Do not leave the motor connected to power and ground for long periods of time.
RECIRCULATION CONTROL MOTOR
3. If the recirculation control motor did not run in step 2, remove it, then check the recirculation control linkage and doors for smooth movement.
• If the linkage and doors move smoothly, replace the recirculation control motor (see page 21-64).
• If the linkage or doors stick or bind, repair them as needed.
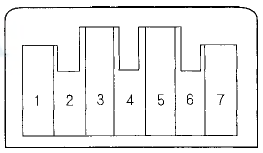
'08-10 models with M/T and '08-09 models 2-door with A/T
NOTE: Before testing the motor, check for HVAC DTCs (see page 21-9).
1. Disconnect the 7P connector from the recirculation control motor.

Incorrectly applying power and ground to the recirculation control motor will damage it. Follow the instructions carefully.
2. Connect battery power to terminal No. 1 of the recirculation control motor, and ground terminal No.
2; the recirculation control motor should run, and stop at Fresh. If it doesn't, reverse the connections; the recirculation control motor should run, and stop at Recirculate. When the recirculation control motor stops running, disconnect battery power immediately.
RECIRCULATION CONTROL MOTOR
3. If the recirculation control motor did not run in step 2, remove it then check the recirculation control linkage and door for smooth movement.
• If the linkage and door move smoothly, replace the recirculation control motor (see page 21-64).
• If the linkage or door sticks or binds, repair them as needed.
• If the recirculation control motor runs smoothly, go to step 4.
4. Measure the resistance between terminals No. 5 and No. 7 of the recirculation control motor. It should be between 4.2 and 7.8 kO.
5. Reconnect the recirculation control motor 7P connector, then turn the ignition switch to ON (ll).
6. Using the backprobe set, measure the voltage between terminals No. 3 and No. 7 of the 7P connector.
Fresh: About 1.0 V
Recirculate: About 4.0 V
7. If either the resistance or the voltage readings are not as specified, replace the recirculation control motor (see page 21-64).
 Mode Control Motor Replacement
1. Remove the blower unit (see page 21-65).
2. Disconnect the 7P connector (A) from the mode
control motor (B). Remove the self-tapping screws
and the mode control motor from the heater unit.
...
 Recirculation Control Motor
Replacement
Recirculation Control Motor
Replacement
1. Remove the glove box (see page 20-174).
2. Disconnect the 7P connector (A) from the
recirculation control motor (B). Remove the
self-tapping screws and the recirculation control
motor from th ...
See also:
Expansion Valve Replacement
1. Remove the evaporator core (see page 21-67).
2. Remove the insulator (A) and bolts, then remove the
expansion valve (B) and O-rings (C).
3. Install the expansion valve in the reverse order o ...
Quarter Glass Replacement
2-door
NOTE:
- Put on gloves to protect your hands.
- Wear eye protection when removing the glass with
piano wire.
- Use seat covers to avoid damaging any surfaces.
- The quarter glass cli ...
Power Door Mirrors
You can adjust the door mirrors when the
ignition switch is in ON .
• Mirror position adjustment
L/R selector switch: Select the left or right
mirror. After adjusting the mirror, return the ...