
 Honda Accord: Countershaft Disassembly
NOTE: Refer to the Exploded View in the Countershaft Reassembly, as needed, when removing components pressed onto the countershaft (see page 13-46).
1. Securely clamp the countershaft assembly In a bench vise with wood blocks.
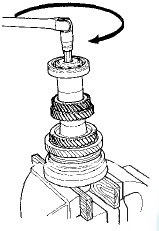
2. Remove the special bolt (left-hand threads).
3. Support the ball bearing (A) on steel blocks (B), then use a press (C) and an attachment (D) to press the countershaft out of the ball bearing.
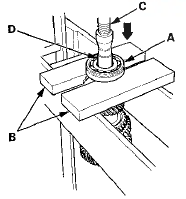
4. Remove the 35 mm shim and the distance collar.
5. Support 4th gear (A) on steel blocks (B), then use a press (C) and an attachment (D) to press the countershaft (E) out of 4th gear and 5th gear.
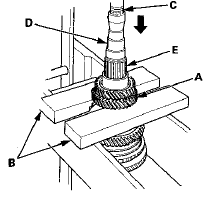
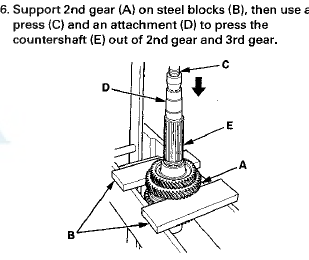
 Countershaft Assembly Clearance Inspection
tightened to the specified torque (see page 13-46).
1. Measure the clearance between 1st gear (A) and the
1st gear distance collar (B) with a feeler gauge (C).
- If the clearance exceeds the se ...
 Countershaft Inspection
1. Inspect the gear and bearing contact areas for wear
and damage, then measure the countershaft at points
A, B, and C. If any part of the countershaft is less than
the service limit, replace it.
...
See also:
Audio/Information Screen
Displays the audio status and wallpaper. From this screen, you can go to
various
setup options.
• Switching the Display
Press the DISP button to go to the Function Change screen.
Ro ...
Memorizing the Tire Pressure Sensor ID
Special Tools Required
TPMS Trigger Tool ATEQ VT55*
- Available through the Honda Tool and Equipment
Program 888-424-6857
All four tire pressure sensor IDs must be memorized to
the TPMS control u ...
Fastening a Seat Belt
After adjusting a front seat to the proper position, and while sitting
upright and well
back in the seat:
2 Adjusting the Seats P. 148
1. Pull the seat belt out slowly.
2. Insert the latch ...