 Honda Accord: Rear Window Defogger

The rear window defogger will clear fog, frost, and thin ice from the window. Push the defogger button to turn it on and off. The indicator in the button comes on to show the defogger is on. It also shuts off when you turn off the ignition switch. You have to turn the defogger on again when you restart the vehicle.
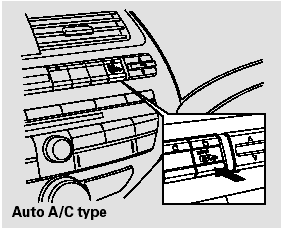
On vehicles with automatic air conditioning system
The defogger will shut itself off within about 10 to 30 minutes according to the outside temperature (over 32°F, 0°C).
Make sure the rear window is clear and you have good visibility before starting to drive.
The defogger and antenna wires on the inside of the rear window can be accidentally damaged. When cleaning the glass, always wipe side to side.
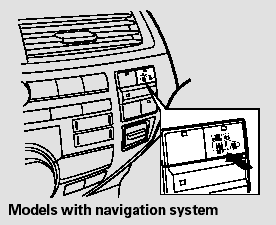
Except U.S. LX
Pushing this button also turns the mirror heaters on or off. For more information.
 HazardWarning Button
Push the button between the center
vents to turn on the hazard warning
lights (four-way flashers). This
causes all four outside turn signals
and both turn indicators in the
instrument pane ...
 Steering Wheel Adjustments
Make any steering wheel
adjustments before you start driving.
Adjusting the steering wheel
position while driving may
cause you to lose control of the
vehicle and be seriously injured
in ...
See also:
Symptom Troubleshooting Index
...
MICU Input Test
NOTE:
# Before t e s t i n g , t r o u b l e s h o o t the m u l t i p l e x i n t e g
r a t e d control unit first, using B-CAN System D i a g n o s i s Test Mode A
(see page 22-134).
• B ...