
 Honda Accord: Display Setup
You can change the brightness or color theme of the audio/information screen.
• Changing the Screen Brightness
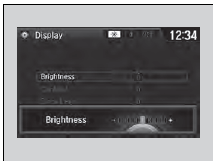
1. Press the SETTINGS button.
2. Rotate  to select System
Settings, then
press
to select System
Settings, then
press  .
.
- Repeat the procedure to select Display.
3. Rotate  to select Brightness,
then
press .
to select Brightness,
then
press .
4. Rotate  to adjust the setting.
• Changing the Screen’s Color Theme
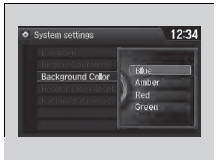
1. Press the SETTINGS button.
2. Rotate  to select System
Settings, then
press
to select System
Settings, then
press  .
.
- Repeat the procedure to select Other.
3. Rotate  to select Background
Color,
then press
to select Background
Color,
then press  .
.
4. Rotate  to select the setting you
want,
then press
to select the setting you
want,
then press  .
.
You can change the Contrast and Black level settings in the same manner.
 Adjusting the Sound
1. Press the SETTINGS button.
2. Rotate to select Audio
Settings, then
press .
3. Rotate to select Sound,
then press .
Rotate to scroll through the
following
choices:
The SVC ...
 Playing AM/FM Radio
The ST indicator appears on the display indicating
stereo FM broadcasts.
Stereo reproduction in AM is not available.
Switching the Audio Mode
Press the SOURCE button on the steering wheel.
...
See also:
ATF Temperature Sensor
Test/Replacement
1. Raise the vehicle on a lift, or apply the parking brake,
block both rear wheels, and raise the front of the
vehicle. Make sure it is securely supported.
2. Remove the splash shield.
3. Disc ...
When Driving
...
Component Location Index
2-door
4-door
...