
 Honda Accord: Brightness Control
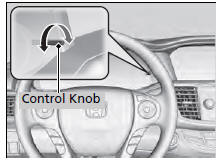
When the parking lights are turned on and the ignition switch is in ON (w*1, you can use the brightness control knob to adjust instrument panel brightness.
Brighten: Turn the knob to the right.
Dim: Turn the knob to the left.
You will hear the beeper when the brightness reaches minimum or maximum. The information display*/multi-information display* will return to its original state several seconds after you adjust the brightness.
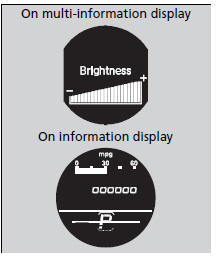
• Brightness level indicator
The brightness level is shown on the information display*/multi-information display* while you are adjusting it.
Instrument panel brightness varies, depending on whether the exterior lights are on or off. The instrument panel dims to reduce glare when they are on.
Pressing the (Select/Reset) knob
switches the
display.
(Select/Reset) knob
switches the
display.
If you turn the knob to the right until the brightness display is up to max, the beeper sounds. This cancels the reduced instrument panel brightness when the parking lights are on.
The brightness can be set differently for when the exterior lights are on, and when they are off.
 Wipers and Washers
The windshield wipers and washers can be
used when the ignition switch is in ON
.
• MIST
The wipers run at high speed until you release
the lever.
• Wiper switch (OFF, INT, LO, HI)
Chan ...
 Rear Defogger/Heated Door Mirror*Button
Press the rear defogger and heated door mirror button to defog the rear
window
and mirrors when the ignition switch is in ON
.
The rear defogger and heated door mirrors
automatically switc ...
See also:
Maintenance
...
Track Repeat
To replay the current track
continuously, select TRACK
REPEAT, and press ENTER on the
interface selector. As a reminder,
you will see REPEAT next to
TRACK on the screen. To turn this
featu ...
Secondary Shaft Idler Gear Removal
and Installation
Special Tools Required
Attachment 42 mm I.D. 07QAD-P0A0100
Removal
Place a spacer (A) on the secondary shaft (B), and set a
puller (C) under the idler gear (D), then remove the idler
gear.
Ins ...