 Honda Accord: Automatic Transmission
Check the fluid level with the engine at normal operating temperature.
1. Park the vehicle on level ground.
Start the engine, let it run until the radiator fan comes on, then shut off the engine. For accurate results, wait about 60 seconds (but no longer than 90 seconds) before doing step 2.
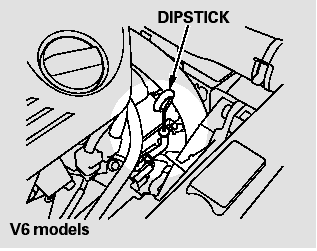
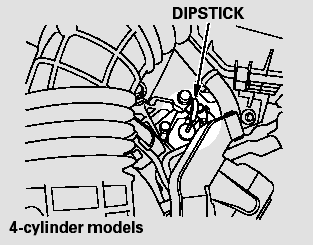
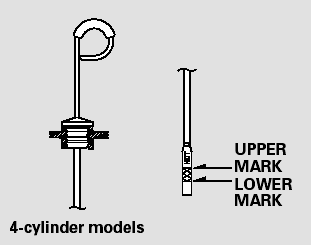
2. Remove the dipstick (yellow loop) from the transmission, and wipe it with a clean cloth.
3. Insert the dipstick all the way into the transmission securely as shown in the illustration.
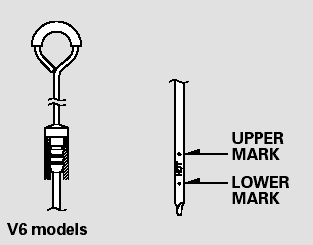
4. Remove the dipstick and check the fluid level. It should be between the upper and lower marks.
5. If the level is below the lower mark, add fluid into the dipstick hole to bring it to the level between the upper and lower marks.
Pour the fluid slowly and carefully so you do not spill any. Clean up any spill immediately; it could damage components in the engine compartment.
Always use Honda ATF DW-1 (automatic transmission fluid).
6. Insert the dipstick all the way back into the transmission securely as shown in the illustration.
The transmission should be drained and refilled with new fluid according to the Maintenance Minder TM.
If you are not sure how to add fluid, contact your dealer.

Use only Honda ATF DW-1 (automatic transmission f luid). Do not mix with other transmission f luids.
Using transmission f luid other than Honda ATF DW-1 may cause deterioration in transmission operation and durability, and could result in damage to the transmission.
Damage resulting from the use of transmission f luid other than Honda ATF DW-1 is not covered by the Honda new vehicle warranty.

 Manual Transmission
4-cylinder models
Check the fluid level with the
transmission at normal operating
temperature and the vehicle sitting
on level ground.
To check the transmission fluid level,
remove the und ...
See also:
Honda Accord 2013-2026 Owner's Manual
...
Symptom Troubleshooting
Hard Steering
NOTE:
-Compare to a known-good vehicle that is the same
trim level.
-Check for suspension damage.
m Check the steering alignment.
-Check the tire condition and pressure.
1 ...
Rear Seat-back Cover Replacement
2-door
NOTE:
- Put on gloves to protect your hands.
- Take care not to tear or damage the seat covers.
1. Remove the seat-back (see page 20-239).
2. Remove all of the head restraints.
3. ...