 Honda Accord: Oil Seal Replacement
Special Tools Required
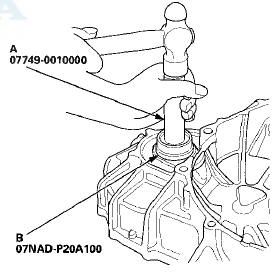
- Driver Handle, 15 x 135L 07749-0010000
- Oil Seal Driver Attachment 07NAD-P20A100
1. Remove the oil seal (A) from the transmission housing (B).
NOTE: Be careful not to damage the transmission housing while removing the oil seal.
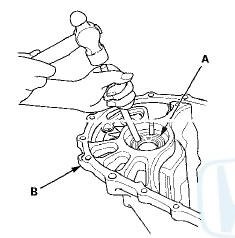
2. Remove the oil seal (A) from the clutch housing (B).
NOTE: Be careful not to damage the clutch housing while removing the oil seal.
3. Install a new oil seal flush with the transmission housing using the 15 x 135L driver handle (A) and the oil seal driver attachment (B).
4. Install a new oil seal flush with clutch housing using the 15 x 135L driver handle (A) and the oil seal driver attachment (B).
 Carrier Bearing Replacement
Special Tools Required
Driver Handle, 40 mm I.D. 07746-0030100
1. Check the carrier bearings for wear and rough
rotation. If they rotate smoothly and their rollers show
no signs of wear, the beari ...
 Differential Thrust Clearance Adjustment
Special Tools Required
Driver Handle, 40 mm I.D. 07746-0030100
1 Remove trie left driveshaft side oil seal from the
transmission housing (see page 13-70).
2. If you removed the 80 mm shim from t ...
See also:
Parking Brake Switch Test
NOTE: if both the ABS/VSA indicator and the brake
system indicator come on at the same time, check the
VSA system for DTCs first (see page 19-48).
1. Remove the center console (see page 20-158).
...
Interface Dial
Most audio system functions can still
be controlled by standard buttons,
dials, and knobs, but some functions
can only be accessed using the
interface dial. The interface dial has
two parts, ...