
 Honda Accord: HVAC Control Unit
Removal / Installation
Honda Accord: HVAC Control Unit
Removal / Installation
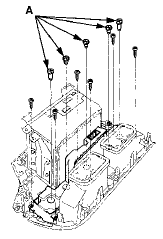
1. Remove the audio unit (see page 23-115).' 2. Remove the self-tapping screws. If necessary, replace the bulbs (A).
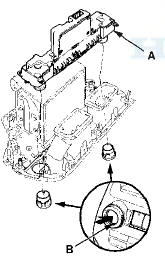
3. While holding the HVAC control unit (A), firmly press the center of one of the dials (B) to remove the outer dial. Repeat for the other outer dial, then remove the unit.
4. Install the control unit in the reverse order of removal.
After installation, operate the various functions to make sure they work properly.
5. Run the self-diagnostic function to confirm that there are no problems in the system (see page 21-10).
 Recirculation Control Motor
Replacement
Recirculation Control Motor
Replacement
1. Remove the glove box (see page 20-174).
2. Disconnect the 7P connector (A) from the
recirculation control motor (B). Remove the
self-tapping screws and the recirculation control
motor from th ...
 Blower Unit Removal/Installation
1. Remove the glove box (see page 20-174).
2. Remove the passenger's undercover (see page
20-170).
3. Remove the right kick panel (see page 20-107).
4. Remove the dust and pollen filter asse ...
See also:
Headlight Replacement
4-door
1. Remove the parts shown.
• Upper fender trim (see page 20-277)
• Front bumper (see page 20-255)
• Front bumper absorber (see page 20-255)
2. Remove the three bolts, and ...
Connecting Rod and Crankshaft End Play Inspection
1. Remove the oil pump (see page 8-16).
2. Remove the baffle plate (see step 8 on page 7-14).
3. Measure the connecting rod end play with a feeler
gauge between the connecting rod and the
cran ...
Rear Door Latch Replacement
4-door
NOTE: Put on gloves to protect your hands.
1. Remove the door panel and the inner handle (see
page 20-38).
2. Remove the plastic cover as needed (see step 3 on
page 20-42).
3. Detac ...