
 Honda Accord: Brake/Taillight and Rear Turn Signal Light/Rear SideMarker Light Bulbs
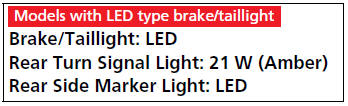
When replacing, use the following bulbs.

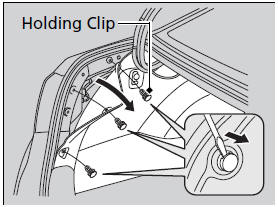
1. Remove the holding clips using a flat-tip screwdriver, then pull the lining back.
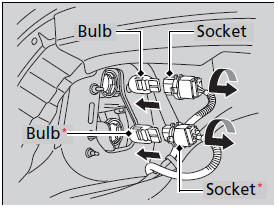
2. Turn the socket to the left and remove it.
3. Remove the old bulb and insert a new bulb.

Brake/taillight and rear side marker light bulbs are LED type. Have an authorized Honda dealer inspect and replace the light bulbs.
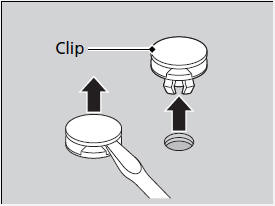
When removing the clip, insert a flat-tip screwdriver, then lift and remove the clip.
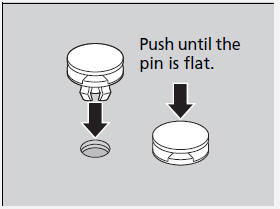
Insert the clip with the pin raised, and push until it is flat.
 Parking Light Bulbs
When replacing, use the following bulbs.
Turn the steering wheel and pull the inner fender back in the same way as
when
replacing the front turn signal/side marker light bulbs.
1. Turn the s ...
 Taillight and Back-Up Light Bulbs
When replacing, use the following bulbs.
1. Remove the holding clips using a flat-tip
screwdriver, then pull the lining back.
2. Turn the socket to the left and remove it.
3. Remove the ol ...
See also:
DTC Troubleshooting
DTC 81152: Gauge Control Module (EEPROM)
Error
NOTE: If you are troubleshooting multiple DTCs, be sure
to follow the instructions in B-CAN System Diagnosis
Test Mode A (see page 22-134).
1. Cle ...
XM Receiver Removal/Installation
1. Open the trunk lid, and remove the right trunk side
trim panel {see page 20-132).
2. Disconnect the connectors (A) from the XM receiver
(B).
4-Door
3. Remove the mounting bolt (C) and lo ...
Rocker Arm and Shaft Disassembly/Reassembly
NOTE:
- Identify each part as it is removed so that each item can be
reinstalled in its original locations,
a Inspect the rocker arm shaft and rocker arms (see page 6-83).
- I ...