 Honda Accord: Opening and Closing the Hood

1. Park the vehicle, and set the parking brake. Pull the hood release handle located under the lower left corner of the dashboard.
The hood will pop up slightly.
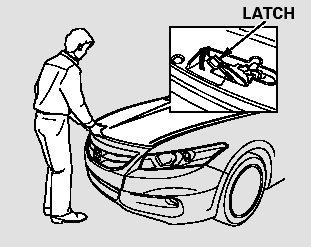
2. Reach in between the hood and the front grille with your fingers.
The hood latch handle is above the ‘‘H’’ logo. Push this handle up until it releases the hood. Lift the hood.
If the hood latch handle moves stiffly, or if you can open the hood without lifting the handle, the mechanism should be cleaned and lubricated.

3. 4-cylinder models
Holding the grip, pull the support rod out of its clip. Insert the end into the hole in the hood designated by an arrow.
To close the hood, lift it up slightly to remove the support rod from the hole. Put the support rod back into its holding clip. Lower the hood to about a foot (30 cm) above the fender, then let it drop. Make sure it is securely latched.
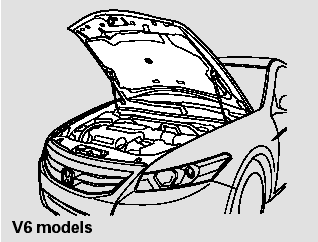
V6 models
Lift the hood up most of the way.
The hydraulic supports will lift it up the rest of the way and hold it up.
To close the hood, lower it to about a foot (30 cm) above the fender, then press down firmly with your hands. Make sure the hood is securely latched.
 Check Fuel Cap Message
Your vehicle’s onboard diagnostic
system will detect a loose or missing
fuel fill cap as an evaporative system
leak. The first time a leak is detected
a ‘‘CHECK FUEL CAP’’ message ...
 Oil Check
Wait a few minutes after turning the
engine off before you check the oil.
1. Remove the dipstick (orange
handle/loop).
2. Wipe off the dipstick with a clean
cloth or paper towel.
3. Inser ...
See also:
Glove Box
Open the glove box by pulling the
handle to the left. Close it with a firm
push. Lock or unlock the glove box
with the master key.
An open glove box can cause
serious injury to your passe ...
Maintenance Main Items and Sub Items
All maintenance items displayed on
the information display are in code.
For an explanation of these
maintenance codes. ...
Special Tools
...