 Honda Accord: Idler Gear/Idler Gear Shaft
Replacement
Honda Accord: Idler Gear/Idler Gear Shaft
Replacement
Special Tools Required
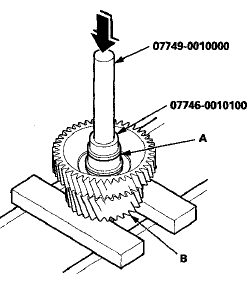
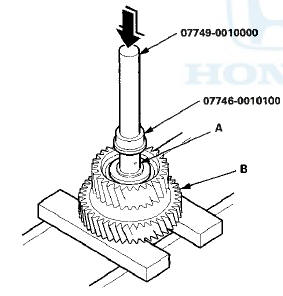
-Driver Handle, 15 x 135L 07749-0010000
-Attachment, 32 x 35 mm 07746-0010100
1. Remove the snap ring from the idler gear/idler shaft assembly. Do not distort the snap ring.
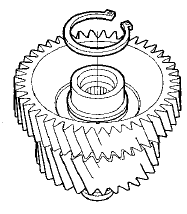
2. Check the snap ring for wear and damage. Replace it if it is worn, distorted, or damaged.
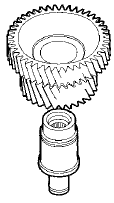
3. Remove the idler gear shaft (A) from the idler gear (B) using the driver handle, the 32 x 35 mm attachment, and a press.
4. Replace the idler gear and/or the idler gear shaft, and attach the idler gear shaft to the idler gear.
6. Install the idler gear shaft (A) in the idler gear (B) using the driver handle, the 32 x 35 mm attachment, and a press.
6. Install the snap ring.
 Idler Gear Shaft Removal and
Installation
Idler Gear Shaft Removal and
Installation
1. Remove the snap ring (A), the cotter retainer (B), and
the 17 mm cotters (C). Do not distort the snap ring.
2. Remove the idler gear shaft/idler gear assembly (D)
from the transmission housing ...
 Clutch Disassembly
Special Tools Required
Clutch Spring Compressor Set 07LAE-PX40000
1. Remove the snap ring using a screwdriver.
2. Remove the clutch end-plate (A), the clutch discs (B)
(5), the clutch wave-plate ...
See also:
System Description
Overview
The electrical compass shows the azimuth information in 8-directions (N, NE,
E, SE, S, SW, W, NW) to the audio-HVAC
display unit via the audio unit.
Starting Operation
When the igniti ...
Driver's Seat Position Sensor Replacement
Removal (Power seat)
NOTE: Do not t u r n t h e i g n i t i o n s w i t c h t o ON (II), a n d do
not connect t h e battery cable w h i l e r e m o v i n g t he
d r i v e r ' s seat p o s i t i o n ...