 Honda Accord: Selecting a Memorized Position
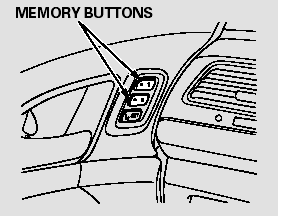
To select a memorized position, do this:
1. Make sure the parking brake is set and the shift lever is in Park (automatic).
2. Press the desired memory button (1 or 2) until you hear a beep, then release the button.
The system will move the driver’s seat to the memorized position. The indicator in the selected memory button will flash during movement.
When the adjustment is complete, you will hear two beeps, and the indicator will stay on.
On vehicles with manual transmission
If the parking brake is not set, you must press and hold the memory button until the adjustment is complete.
To stop the system’s automatic adjustment, do any of these actions:
Press any button on the driver’s door: SET, memory button 1 or 2.
Push any of the adjustment switches for the seat.
Shift out of Park (automatic).
Release the parking brake (manual).
If desired, you can use the adjustment switches to change the seat position after it is in its memorized position. If you change the memorized position, the indicator in the memory button will go out. To keep this seat position for later use, you must store it in the driver’s seat position memory.
 Storing a Driving Position in Memory
Store a driving position only when
the vehicle is parked.
1. Turn the ignition switch to the ON
(II) position. You cannot add a
new driving position to the
memory unless the ignition switch
...
 Mirrors
Keep the inside and outside mirrors
clean and adjusted for best visibility.
Be sure to adjust the mirrors before
you start driving.
The inside mirror has day and night
positions. The night p ...
See also:
Fuel Economy
Improving Fuel Economy
Fuel economy depends on several conditions, including driving conditions,
your
driving habits, the condition of your vehicle, and loading. Depending on these
and
other ...
Circuit Diagram
...