 Honda Accord: Rear Seat Armrest Replacement
Special Tools Required
KTC Trim Tool Set SOJATP2014*
*Available through the Honda Tool and Equipment Program; call 888-424-6857
4-door
NOTE: - Use the appropriate tool from the KTC trim tool set to avoid damage when removing components.
- Take care not to tear or damage the seat covers.
1. Fold down the seat-back.
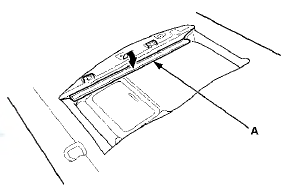
2. Remove the trunk pass-through lid (see page 20-247).
3. Release the hook strip (A), then turn over the seat-back cover as necessary.
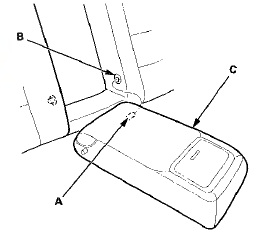
4 Remove the clip (A) from the armrest pivot shaft (B).
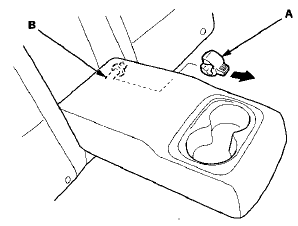
5. Remove the armrest clip (B) from the slit in the collar A by pinching the clip.
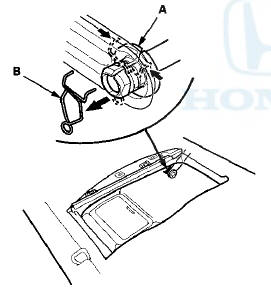
6. Slide the armrest (A) toward the driver's side, and remove the pivot shaft (B) from the collar (C).
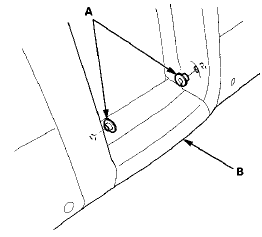
7. Remove the pivot shaft (A) from the collar (B), then remove the armrest (C).
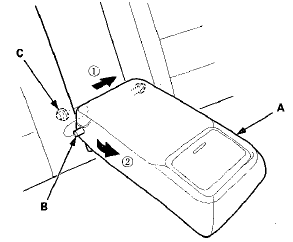
8. Remove the collars (A) from the seat-back (B).
9. Install the armrest in the reverse order of removal, and prevent wrinkles when installing a seat-back cover, make sure the material is stretched evenly over the pad before securing the hook strips.
 Rear Seat-back Release Lever/Cable
Removal/Installation
Rear Seat-back Release Lever/Cable
Removal/Installation
NOTE:
- Take care not to bend or scratch the interior trim.
- 4-door is shown; 2-door is similar.
1. Remove the rear shelf (see page 20-128).
2. Disconnect the seat-back release cable (A) fr ...
 Trunk Pass-through Lid Lock Cylinder
Replacement
Trunk Pass-through Lid Lock Cylinder
Replacement
Special Tools Required
KTC Trim Tool Set SOJATP2014*
*Available through the Honda Tool and
Equipment
Program; call 888-424-6857
4-door
NOTE:
- Take care not to scratch the trunk pass-through l ...
See also:
Frame Repair Chart
Top View
g2 Front floor locating hole 025 (0.98) rear
h2 Front floor tunnel frame locating hole 013 (0.51) rear
i Rear frame A locating hole 025 (0.98)
j Rear floor locating hole 025 (0.98)
k1 ...
Maintenance Items Under the Hood
...
Door Locks
To lock both doors, push the front of
the master door lock switch on
either door, pull the lock tab
rearward on the driver’s door, or use
the key on the outside lock on the
driver’s do ...