 Honda Accord: Rear Door Outer Handle Replacement
4-door
NOTE: - Put on gloves to protect your hands.
- Take care not to scratch the door.
1. Remove the door panel (see page 20-38).
2. Disconnect the power door lock actuator connector (A), and detach the harness clips (B).
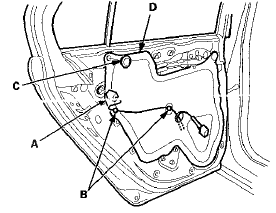
3. Remove the rear plug cap (C), then remove the plastic cover (D) as needed.
NOTE: If the plastic cover is damaged or torn, replace it with a new one.
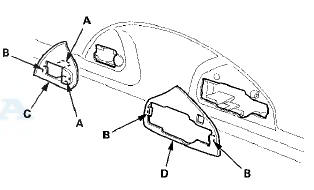
4. Remove the hole seal (A).
5. While holding the outer handle cover (A), remove the bolt a n d release the hooks (B) of the outer handle cover, then remove the cover.
6. Release the hooks (A), then remove the outer handle holder (B) from the outer handle base (C).

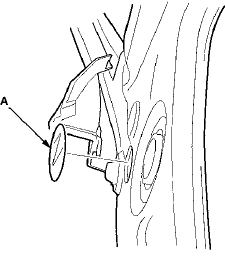
7. Pull back the outer handle (A), and out as shown to remove it from the door.
8. Release the hooks (A, B), then remove the outer handle front seal (C) and the outer handle rear seal (D).
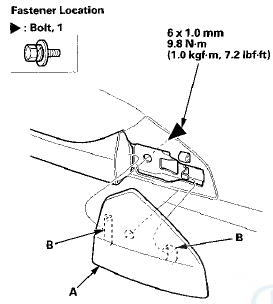
3. Remove the outer handle base (A).
-1. Release the rod fastener ( B ) .
-2. Disconnect the outer handle rod (C) with a clip remover, -3. Loosen the nut.
-4. Release the hook (D), and slide the outer handle base forward to release the special bolt (E) from the door.
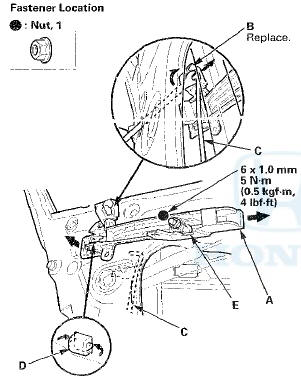
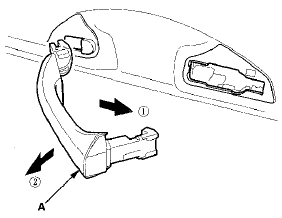
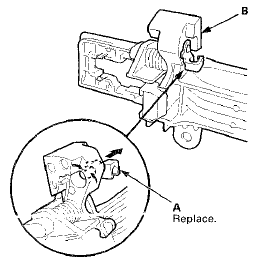
10. Remove the rod fastener (A) from the outer handle base ( B ) , then replace it with a new one.
11. Install the handle in the reverse order of removal, and note these items: - Reinstall the outer handle holder before installing the outer handle cover.
- Make sure that the power door lock actuator connector is plugged in properly, and that the outer handle rod is connected securely.
- Make sure the door locks operate properly.
- Make sure the door handle works properly.
- When reinstalling the door panel, make sure the plastic cover on the door is installed properly .
- Push the hooks and the clip into place securely.
 Rear Door Panel Removal/Installation
Special Tools Required
-KTC Trim Tool Set SOJATP2014
- Trim Pad Remover Snap-on A 177A, commercially
available
*Available through the Honda Tool and
Equipment
Program; call 888-424-6857
4-door ...
 Rear Door Latch Replacement
4-door
NOTE: Put on gloves to protect your hands.
1. Remove the door panel and the inner handle (see
page 20-38).
2. Remove the plastic cover as needed (see step 3 on
page 20-42).
3. Detac ...
See also:
Trunk Lid Weatherstrip Replacement
NOTE: 4-door Is shown; 2-door Is similar.
1. Remove the trunk lid weatherstrip (A) by pulling it off.
2. Locate the painted alignment mark (B or C) on the
trunk lid weatherstrip. Align the pain ...
Sealing Bolt Installation
NOTE: When installing the sealing bolt (A), always use a
new washer.
...
Yaw Rate-Lateral Acceleration Sensor Replacement
NOTE:
- Do not damage or drop the sensor as It Is sensitive.
- Do not use power tools when replacing the
sensor.
1. Turn the ignition switch to LOCK (0).
2. Remove the center console (see ...