 Honda Accord: ODS Unit Initialization
NOTE: • After SRS unit or ODS unit is replaced, do this procedure to initialize the ODS unit.
• ODS unit initialization will initialize both OPDS sensor and front passenger's weight sensor.
OPDS Sensor Initialization
After a seat-back cover/pad, seat-back cushion, and/or ODS unit is replaced, do this procedure to initialize the OPDS sensor with the HDS.
NOTE: • A new (uninitialized) ODS unit installed with a faulty OPDS sensor can cause DTC 85-71 and DTC 85-78.
• Before initializing the ODS unit, make sure the battery is fully charged.
1. Clear the DTC with the HDS (see page 24-38).
2. Make sure the front passenger's seat is dry. Set the seat-back in a normal position, and make sure there is nothing on the seat.
3. Make sure the ignition switch is in LOCK (0).
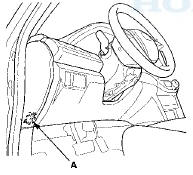
4. Connect the HDS to the data link connector (DLC) (A).
5. Turn the ignition switch to ON (11).
6. Make sure the HDS communicates with the vehicle and the SRS unit. If it does not communicate, troubleshoot the DLC circuit (see page 11-181).
7. From the HDS Main Menu, select SRS, then INITIALIZATION. In the INITIALIZATION Menu, select OPDS Initialization. Follow the prompts until the OPDS sensor initialization has been completed.
8. Turn the ignition switch to LOCK (0).
9. Disconnect the HDS from the DLC.
NOTE: Ifthe ODS unit fails to initialize after several attempts, replace the seat-back cover/pad with equipped OPDS sensor, 4-door (see page 20-221), 2-door (see page 20-213) and retry. Ifthe ODS unit continues to fail to initialize, replace the ODS unit (see page 24-237).
Front Passenger's Weight Sensor Initialization
When you replace the SRS unit, the front passenger's weight sensor, the front passenger's seat assembly, or the ODS unit, initialize the front passenger's weight sensor with the HDS unit.
While doing the ODS unit, observe these precautions: • Make sure all components of the front passenger's seat are correctly installed.
• Make sure nothing is on the front passenger's seat.
• Make sure there is nothing in the front passenger's seat-back pocket.
• Keep the windows and the moonroof closed.
• Do all calibration procedures, except test-driving, in the service bay.
• Make sure the vehicle is on level ground.
• Keep the A/C and the heater off.
•Do not touch the front passenger's seat during initialization, until you are prompted to or when you have completed the initialization.
• Do not expose the front passenger's seat to sudden temperature changes.
1. Position the front passenger's seat all the way rearward, and adjust the seat-back to the forward most position. Do not move the seat from this position.
2. Make sure the ignition switch is in LOCK (0).
3. Connect the HDS to the data link connector (DLC) (A).
4. Turn the ignition switch to ON (II).
5. Make sure the HDS communicates with the vehicle and the SRS unit. If it does not communicate, troubleshoot the DLC circuit (see page 11-181).
6. Drive the vehicle, and accelerate to 20 mph (36 km/h), then stop on level ground.
7. From the HDS Main Menu, select SRS, then INITIALIZATION. In the INITIALIZATION Menu, select SWS Initialization. Follow the prompts until the front passenger's weight sensor initialization has been completed.
8. Turn the ignition switch to LOCK (0).
9. Disconnect the HDS from the DLC.
 SRS Unit Update
Special Tools Required
• Honda Diagnostic System (HDS) tablet tester
• Honda Interface Module (HIM) and an iN workstation
with the latest HDS software version
• HDS pocket tester
� ...
 ODS Unit Operation Check
Check the ODS operation after any of these actions:
• Replacement of front passenger's seat component(s)
(except ODS unit and/or weight sensors)
• After a vehicle collision
• SRS un ...
See also:
DTC Troubleshooting
DTC P062F: Powertrain Control Module (PCM)
Internal Control Module Keep Alive Memory
(KAM) Error
NOTE: Before you troubleshoot record all freeze data
and any on-board snapshot with the HDS, and re ...
Restraints
Special Tools
...
Bulb Replacement
Headlight (High'Beam)
1. Disconnect the 2P connector (A) from the headlight
Headlight (High Beam): 60 W
2. Turn the bulb socket 45 В° counterclockwise to remove
the bulb.
3. Install a new b ...