 Honda Accord: Front Bumper Removal/Installation
NOTE: - Have an assistant help you when removing and installing the front bumper.
- Take care not to scratch the front bumper or the body.
- Put on gloves to protect your hands.
- When prying with a flat-tip screwdriver, wrap it with protective tape to prevent damage.
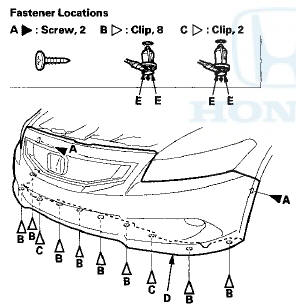
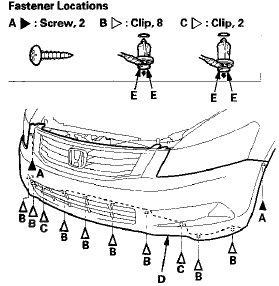
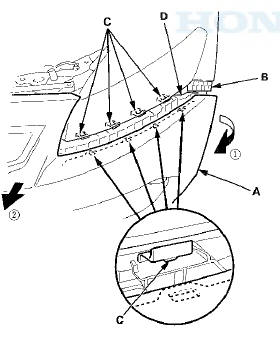
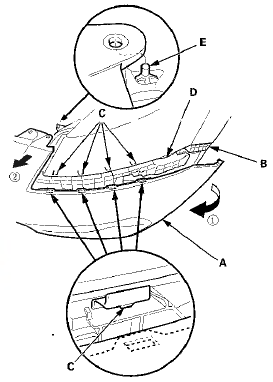
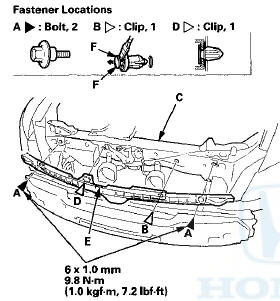
1. Remove the front grille cover: - 2-door (see page 20-274) - 4-door (see page 20-274) 2. Remove the screws (A) and the clips (B, C) securing the front bumper (D).
NOTE: To release the clips, pry up on the center pin at the notch (E).
2-door
4-door
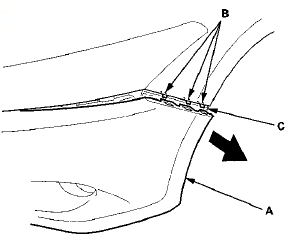
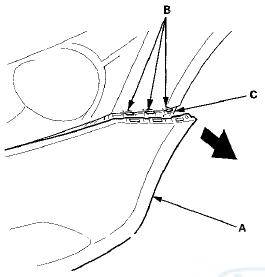
3. Pull the front bumper (A) at the wheel arch areas to release it from the hooks (B) on the side spacers (C).
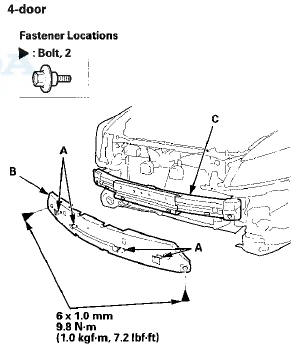
2-door
4-door
4. 2-door: With the help of an assistant, pull both sides of the front bumper (A) away from the side spacers (B).
Then pull out the front bumper to release the hooks (C) from the upper beams (D).
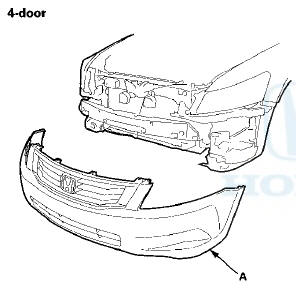
5.4-door: With the help of an assistant, pull both sides of the front bumper (A) away from the side spacers (B).
Then pull out the bumper to release the hooks (C) from the upper beams (D), and release the bumper from the pins (E) on both headlights.
NOTE: When releasing the last hook, release it while holding the front bumper to prevent damaging the pin.
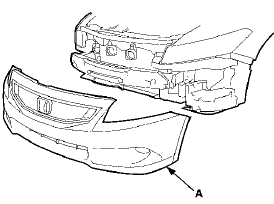
6. Remove the front bumper (A).
2-door.
7. If necessary, remove the bolts, and release the hooks (A), then remove the front bumper absorber (B) from the front bumper beam (C).
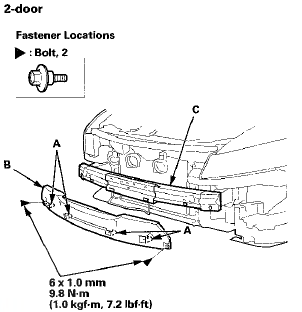
8.2-door: If necessary, remove the bolts (A) and the clip (B) securing the front bumper center upper beam (C).
Detach the clip (D), and release the hook (E), then remove the beam from the body.
NOTE; To release the clip B, pry up on the center pin at the notch (F).
9. Install the bumper in the reverse order of removal, and note these items: - Make sure the front bumper engages the hooks (of both upper beams and side spacers) and the pins (4-door) (of both headlights) on each side securely.
- If the clips are damaged or stress-whitened, replace them with new ones.
- Push the clips and the hooks into place securely.
 Bumpers
...
 Front Bumper Fog Light Cover
Replacement
Front Bumper Fog Light Cover
Replacement
2-door
NOTE; Take care not to scratch the front bumper.
1. Remove the front bumper (see page 20-255).
2. Remove the screws (A, B), then remove the front
bumper fog light cover (C) from the fro ...
See also:
Door Position Adjustment
NOTE: Check for a flush fit with the body, then check for
equal gaps between the front, rear, and bottom door
edges and the body. Check that the door and body edges
are parallel.
1. Place the ve ...
Maximum Load Limit
The maximum load for your vehicle is 850 lbs (385 kg).
See Tire and Loading Information label attached to the driver's doorjamb.
This figure includes the total weight of all occupants, cargo, an ...
Clutch Hydraulic System Bleeding
NOTE:
- Do not reuse the drained fluid. Always use Honda
DOT 3 Brake Fluid from an unopened container. Using
a non-Honda brake fluid can cause corrosion and
shorten the life of the system.
- Ma ...