 Honda Accord: DTC Troubleshooting Index
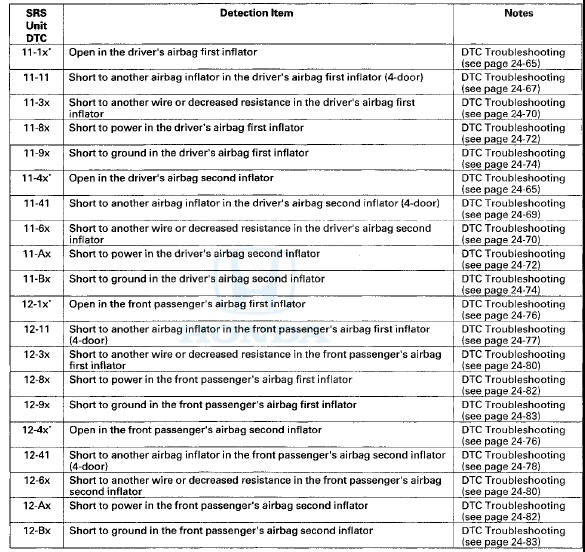

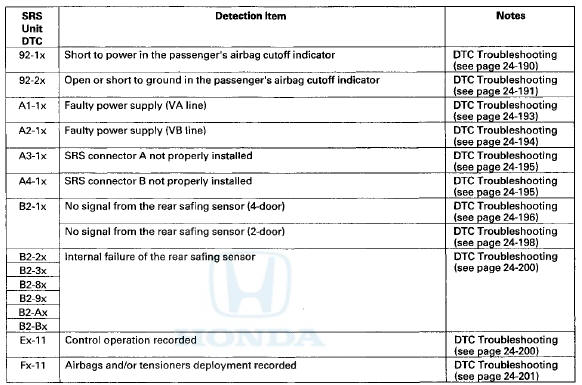
NOTE: The "x" at the end of each DTC denotes a numeric character (0 thru 9), or items with an asterisk (*) (0, 2 thru 9), or an alpha character (A thru F) that you will see on the HDS display. The character is unrelated to your troubleshooting; it designates the SRS unit manufacturer and other detail used for product analysis.
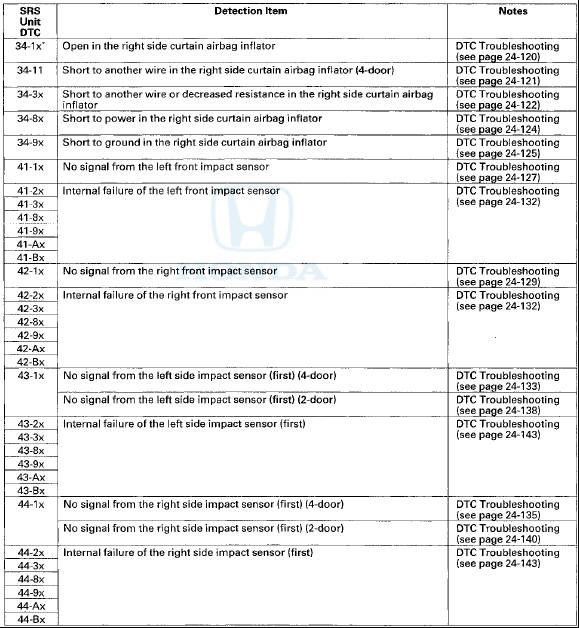
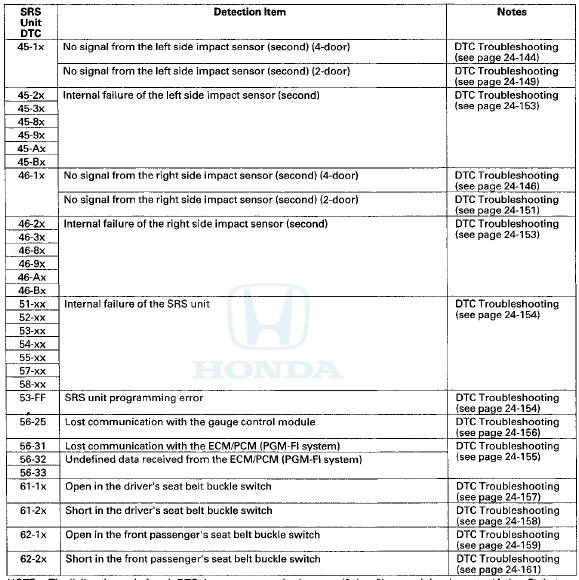
NOTE: The "x" at the end of each DTC denotes a numeric character (0 thru 9) or an alpha character (A thru F) that you will see on the HDS display. The character is unrelated to your troubleshooting; it designates the SRS unit manufacturer and other detail used for product analysis.
NOTE: The "x" at the end of each DTC denotes a numeric character (0 thru 9), or items with an asterisk (*) (0,2 thru 9), or an alpha character (A thru F) that you will see on the HDS display. The character is unrelated to your troubleshooting; it designates the SRS unit manufacturer and other detail used for product analysis.
Only read DTCs from the SRS menu, not from SWS menus unless Instructed to check SWS DTCs. SWS (ODS unit) DTCs are subcodes of SRS unit DTCs. Only troubleshoot the corresponding SRS DTCs.
SWS DTC Index
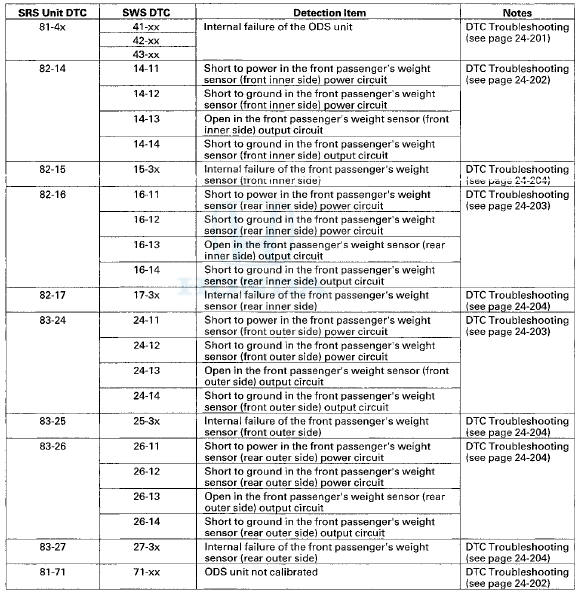
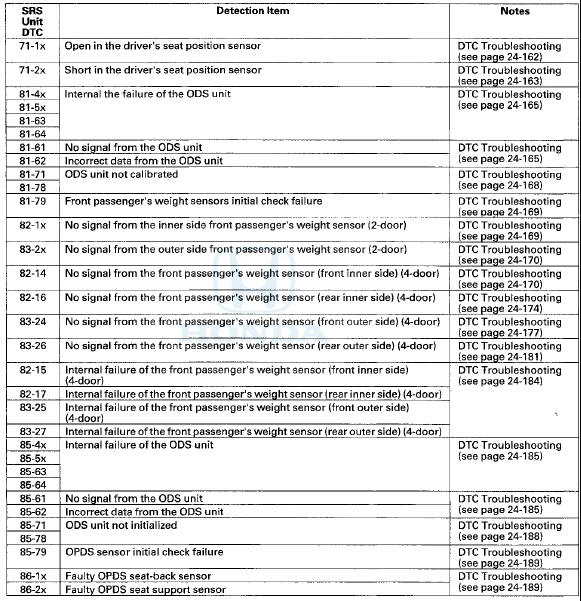
NOTE: The "x" at the end of each DTC denotes a numeric character (0 thru 9) or an alpha character (A thru F) that you will see on the HDS display. The character is unrelated to your troubleshooting; it designates the SRS unit manufacturer and other detail used for product analysis.
 Driver's Seat Position Sensor Operation Check
Check the driver's seat position sensor after driver's seat
position sensor replacement.
1. Make sure the driver's seat is all the way forward
position.
2. Make sure the ignition switch is in L ...

See also:
Protecting Children - General Guidelines
Children depend on adults to protect
them. However, despite their best
intentions, many adults do not know
how to properly protect child
passengers.
If you have children, or ever need to
...
Park Pin Switch Test
Produced in USA models
1. Remove the center console (see page 20-158).
2. Disconnect the A/T gear position indicator panel
light/park pin switch 6P connector (A) from the park
pin switch (B).
...
HFL Switch Removal/Installation
1. Remove the steering wheel (see page 17-6).
2. Remove the HFL switch (see page 17-7).
3. Install the HFL switch in the reverse order of removal. ...