 Honda Accord: Door Glass Adjustment
NOTE: Check the door weatherstrip and the glass run channel for damage or deterioration, and replace them if necessary.
1. Place the vehicle on a firm, level surface when adjusting the door glass.
2. Remove these items: - Door panel: - 2-door (see page 20-12) - 4-door front door (see page 20-17) - 4-door rear door (see page 20-38) - Plastic cover: .
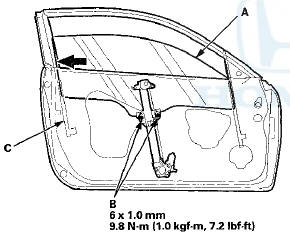
- Front door (see step 3 on page 20-21) - Rear door (see step 3 on page 20-42) 3. Carefully lower the glass (A) until you can see the nourtting bolts (B), then loosen them.
2-door
4-door front
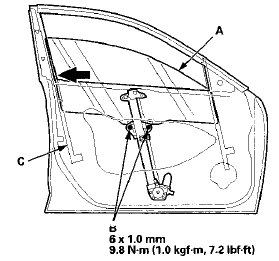
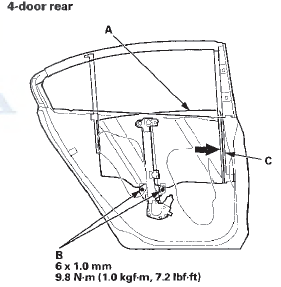
4. Push the glass against the glass run channel (C), then tighten the glass mounting bolts.
5. Check that the glass moves smoothly.
6. Raise the glass fully, and check for gaps. Also make sure that the glass (A) contacts the glass run channel (B) evenly.
7. Attach the plastic cover making sure it is sealed around its outside perimeter to seal out water.
8. Reinstall the door panel: - 2-door (see page 20-12).
- 4-door front door (see page 20-17).
- 4-door rear door (see page 20-38).
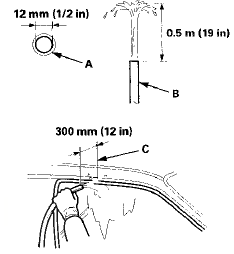
9. Check for water leaks. Run water over the roof and on the sealing area as shown, and note these items: - Use a 12 mm (1/2 in) diameter hose (A).
- Adjust the rate of water flow as shown (B).
- Do not use a nozzle.
- Hold the hose about 300 mm (12 in) away from the door (C).
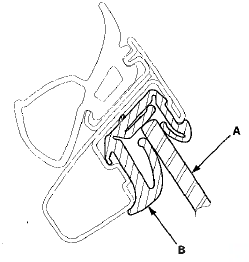
 Rear Door Weatherstrip Replacement
4-door
NOTE;
- Put on gloves to protect your hands.
- Take care not to scratch the door.
- Take care not to damage the front upper
corner clip
(black) and the rear upper corner clips (black ...
 Door Position Adjustment
NOTE: Check for a flush fit with the body, then check for
equal gaps between the front, rear, and bottom door
edges and the body. Check that the door and body edges
are parallel.
1. Place the ve ...
See also:
Headlight Replacement
4-door
1. Remove the parts shown.
• Upper fender trim (see page 20-277)
• Front bumper (see page 20-255)
• Front bumper absorber (see page 20-255)
2. Remove the three bolts, and ...
Safety Messages
Your safety, and the safety of others, is very important. To help
you make informed decisions, we have provided safety
messages, and other safety information throughout this manual.
. Of course, ...
Console Compartment
To open the console compartment,
pull up on the lever and lift the
armrest.
To close, lower the armrest, and
push it down until it latches. ...