 Honda Accord: Compass Calibration

The compass may need to be manually calibrated after exposure to a strong magnetic field. If the compass seems to be continually showing the wrong direction and is not self-calibrating, or the compass display is blinking with the CAL indicator on, do the following procedure.
NOTE: Do this procedure in an open area, away from buildings, power lines, and other vehicles.
1. Turn the ignition switch to the ON (II) position.
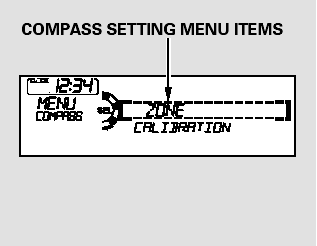
2. Press and hold the MENU button for about 5 seconds until you hear a beep. The display shows you the compass setting menu items.
3. Turn the selector knob to select ‘‘CALIBRATION.’’

4. Press the selector knob (ENTER) to enter your selection. The display shows you ‘‘PUSH CAL START.’’
While setting the compass, pressing the RETURN button will go back to the previous display.
Pressing the MENU button will cancel the compass setting mode.
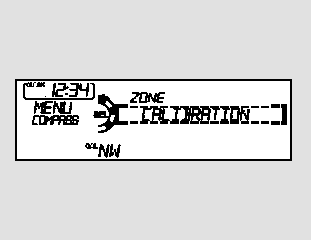
5. Press the selector knob (ENTER).
The compass display is blinking and the CAL indicator is shown.
6. Drive the vehicle slowly in two complete circles.
When the calibration is successfully completed, the CAL indicator goes off and the compass display will stop blinking and show an actual heading.
The audio system is not related to the compass system. Even if the compass system is calibrating, the display returns to the normal display which you last selected.
 Compass Operation
Compass operation can be affected
by driving near power lines or
stations, across bridges, through
tunnels, over railroad crossings, past
large vehicles, or driving near large
objects that c ...
 Compass Zone Selection
In most areas, there is a variation
between magnetic north and true
north. Zone selection is required so
the compass can compensate for this
variation. To check and select the
zone, do this: ...
See also:
Balancer Shaft Inspection
1. Seat the balancer shaft by pushing it away from the oil
pump sprocket end of the oil pump.
2. Zero the dial indicator against the end of the balancer
shaft, then push the balancer shaft back a ...
Fuel Line/Quick-Connect Fitting
Removal
NOTE: Before you work on the fuel lines and fittings,
read the Fuel Line/Quick-Connect Fitting Precautions
(see page 11-313).
1. If equipped, remove the quick-connect fitting cover
from the fuel ...