 Honda Accord: Changing the Wiper Blade Rubber
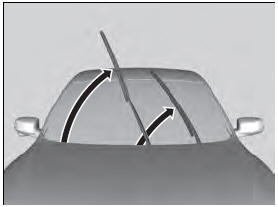
1. Lift the driver side wiper arm first, then the passenger side.
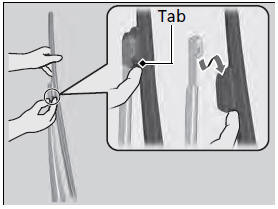
2. Press and hold the tab, then slide the blade from the wiper arm.
NOTICE
Avoid dropping the wiper arm; it may damage the windshield.
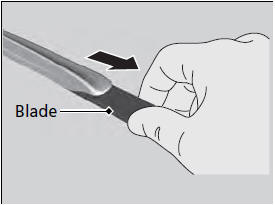
3. Slide the wiper blade out from its holder by pulling the tabbed end out.
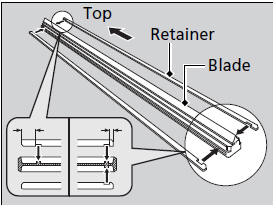
4. Remove the retainers from the rubber blade
that has been removed, and mount to a
new rubber blade.
- Correctly align the rubber protrusion and
the retainer grooves.

5. Slide the new wiper blade onto the holder
from the bottom end.
- The tab on the holder should fit in the
indent of the wiper blade.
6. Slide the wiper blade onto the wiper arm,
then push down the lock tab.
7. Lower the passenger side wiper arm first,
then the driver side.
 Checking Wiper Blades
If the wiper blade rubber has deteriorated, it will leave streaks and the
metal wiper
arm may scratch the window glass. ...

See also:
Circuit Diagram
...
ELD Replacement
1. Do the battery terminal disconnection procedure (see
page 22-91).
2. Remove the upper cover (A), then remove the two
positive ( + ) terminals (B).
3. Remove the under-hood fuse/relay box (C ...