 Honda Accord: Replacing a Front Turn Signal/Parking Light Bulb
1. Open the hood.
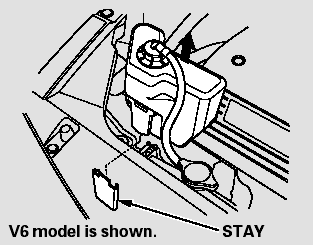
To change the turn signal bulb on the passenger’s side, remove the engine coolant reserve tank by pulling it out of its stay.
Driver’s side on V6 models
Remove the air intake duct.
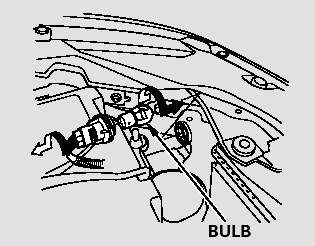
2. Remove the socket from the headlight assembly by turning it one-quarter turn counterclockwise.
3. To remove the burned out bulb, push it in and turn it counterclockwise until it unlocks.
4. Install the new bulb and turn it clockwise to lock it in place.
5. Insert the socket back into the headlight assembly. Turn it clockwise to lock it in place.
6. Turn on the lights to make sure the new bulb is working.
7. Passenger’s side
Reinstall the coolant reserve tank.
Driver’s side on V6 models
Reinstall the air intake cover and duct securely. Reinstall the fastener and secure it by pushing on the head until it locks.
 Replacing a Headlight Bulb
Your vehicle has halogen headlight
bulbs. When replacing a bulb, handle
it by its base, and protect the glass
from contact with your skin or hard
objects. If you touch the glass, clean
it wi ...
 Replacing a Front Side Marker Light Bulb
1. To change the bulb on the driver’s
side, start the engine, turn the
steering wheel all the way to the
right, then turn off the engine. To
change the bulb on the passenger’s
side, tu ...
See also:
Engine Assembly
...
DTC Troubleshooting
DTC B1280: Turn Signal Switch Circuit
Malfunction
NOTE: If you are troubleshooting multiple DTCs, be sure
to follow the instructions in B-CAN System Diagnosis
Test Mode A (see page 22-134).
1. ...
Fuel Pressure Regulator Replacement
1. Remove the fuel tank unit (see page 11-320).
2. Remove the reservoir (A).
3. Remove the bracket (B).
4. Remove the fuel pressure regulator (C).
5. Install the parts in the reverse order ...